31
Recording
Recording
Disc Playback EditingBefore you start Connections Getting started
Changing the Setting menu
VCR functions Others
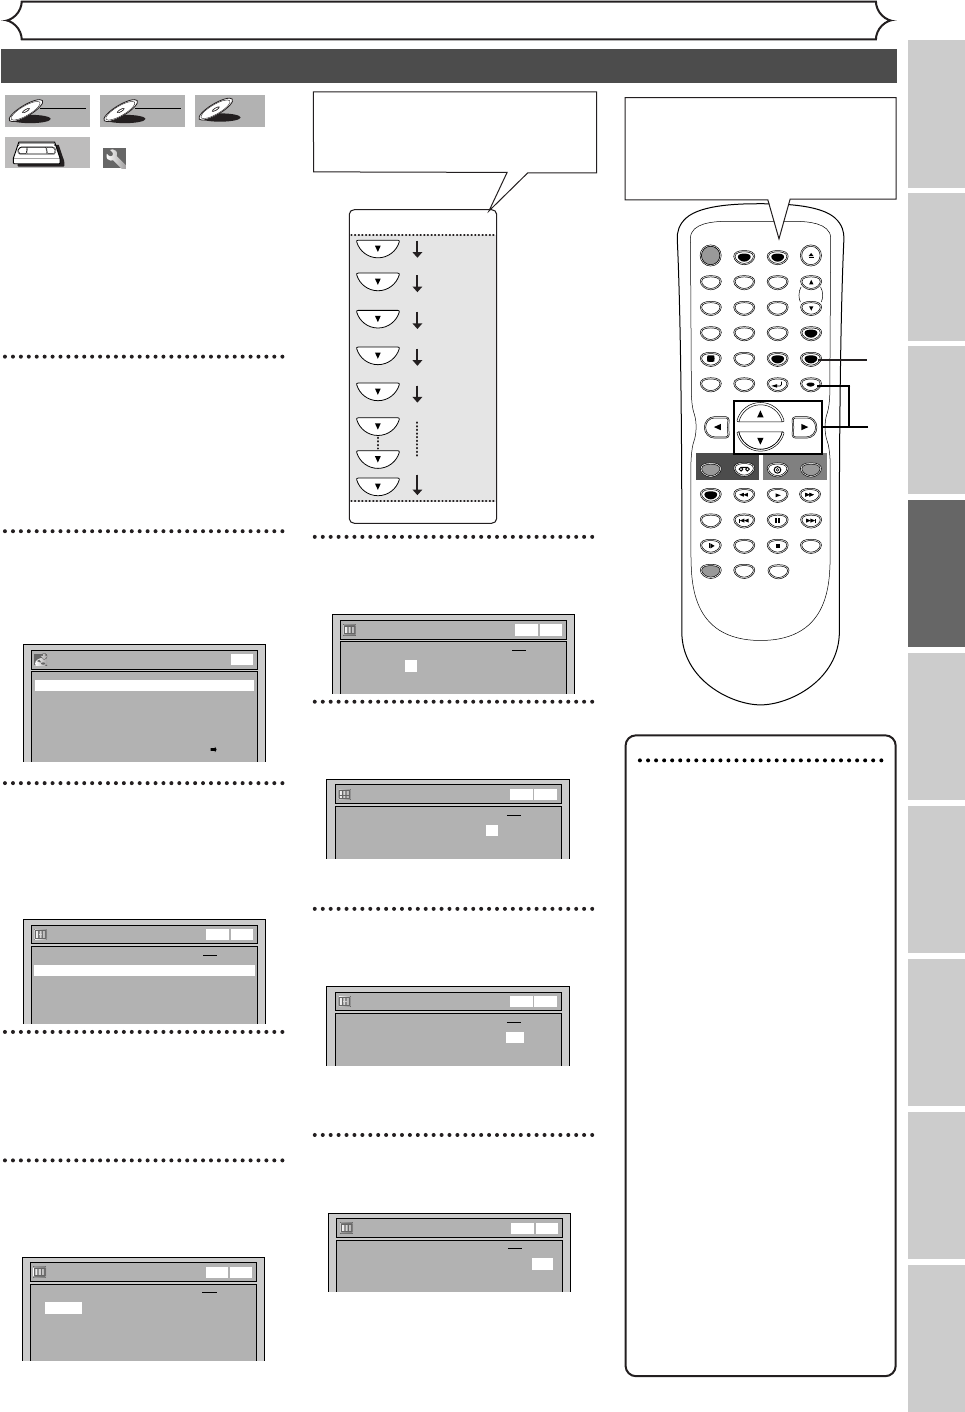
Timer Recording
You can program the unit to record
up to 8 programs within a month in
advance. Daily or weekly program
recordings are also available.
• Be sure to set the clock before
programming a timer recording.
• Insert a recordable disc or a
videotape with a record tab.
1
Press [SETUP].
Easy Setting Menu or Advanced
Setting Menu will appear.
If Easy Setting Menu is displayed,
proceed to step 3.
2
(Advanced Setting Menu only)
Using [K / L], select
“Recording”. Press [ENTER].
Recording menu will appear.
3
Using [K / L], select “Timer
Programming”. Press
[ENTER].
Timer Programming list will appear.
4
Using [K / L], select a pro-
gram number. Press
[ENTER].
5
Using [K / L], enter the date.
Press [
B].
e.g. January 1st
6
Using [K / L], enter start and
end time. Press [B].
7
Using [K / L], select the channel
number. Press [B].
To r ecord from external input,
select L1 or L2.
8
Using [K / L], select a record-
ing media. Press [B].
•To record on to a videotape, select
VCR.
•To record on to a disc, select DVD.
9
Using [K / L], select a record-
ing speed.
Refer to “Recording speed” on page
25 for DVD or page 75 for VCR.
Timer Programming
VCR DVD
2. ---
1. JAN/01 12:57AM 1:57AM 8 DVD 1H
Date Start End CH Speed
DVD
VCR
Timer Programming
2. ---
1. JAN/01 12:57AM 1:57AM 8 DVD
Date Start End CH Speed
DVD
VCR
VCR DVD
Timer Programming
VCR DVD
2. ---
1. JAN/01 12:57AM 1:57AM 8 DVD
Date Start End CH Speed
DVD
VCR
Timer Programming
DVD
VCR
VCR DVD
2. ---
1. JAN/01 12:57AM --:-- L1 DVD
Date Start End CH Speed
Daily
MON-SAT
JAN/01
JAN/31
MON-FRI
SAT
FRI
SUN
Timer Programming
VCR DVD
2. ---
3. ---
4. ---
1. JAN/01 --:-- --:-- L1 DVD
Date Start End CH Speed
DVD
VCR
Timer Programming
2. ---
3. ---
4. ---
1. ---
VCR DVD
Date Start End CH Speed
DVD
VCR
Recording
Auto Chapter 10 minutes
Timer Programming
DVD-RW Recording Format Video mode
Auto Finalize
Dubbing Mode VCR DVD
DVD
VCR
VCR
DVD-R
DVD-R
DVD-RW
DVD-RW
VR
DVD-RW
DVD-RW
Video
Note
• If you have not set the
clock yet:
A clock setting window will
appear after step 3. Continue
with step 4 in “Auto Clock
Setting” on page 22 or
“Manual Clock Setting” on
page 23 before setting a timer
programming.
• Use [{ / B] to move the
cursor to the left and the
right on the timer program-
ming menu.
•
After step 11,you can use the
other component (VCR or
DVD) which is not currently
programmed by turning the
power on. Note that the pro-
grammed device will start to
capture the selected channel 2
minutes before the start time
and at the moment, if the other
device still stays in recording,
recording pause or OTR mode
turning a different channel, the
current mode will be canceled
and you cannot change the chan-
nel.When both devices capture
the same channel, the current
mode continues to function.
When pressing [L] at the cur-
rent date,Timer Recording mode
will change as follows.
STOP
POWER
T- SET
TIMER PROG.
SKIP SKIP
OPEN/CLOSE
SPACE
123
456
78
0
9
CH
VIDEO/TV
SLOW
PAUSE
.@/:
ABC DEF
GHI JKL MNO
PQRS
REC/OTR
DISPLAY
TUV WXYZ
DVD
REC/OTR
REC SPEED
ZOOM
SEARCH
VCR
SETUP
CM SKIP
RETURN
MENU/LIST
TOP MENU
DUBBING
REC MONITOR
CLEAR
ENTER
PLAY
AUDIO
8
9
1
2
3
4
5
7
6
You can choose the timer
programming menu by press-
ing [TIMER PROG.]. In this
case, continue with step
4.
E9601CD_EN.qx3 05.7.5 3:04 PM Page 31


