


24 Chapter 2 iMovie HD Tutorial
Step Seven: Make Adjustments to Clips
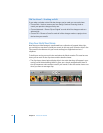
Now that you have a movie with video, photos, and a title, you may want to make
some adjustments to your video clips. Most of the editing you do in iMovie occurs in
the timeline viewer. In this step, you’ll learn how to make small or large changes to your
video clips by trimming them in the timeline viewer.
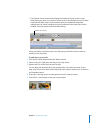
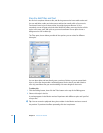
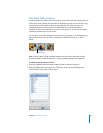
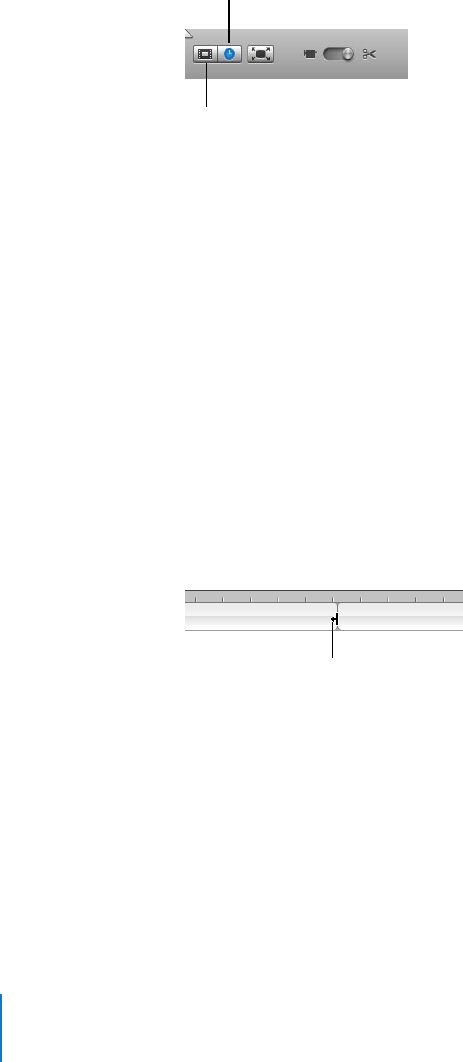
To switch to the timeline viewer:
m Click the timeline viewer button below the iMovie monitor. The timeline viewer button
has a clock on it.
Video clips appear in the top track in the timeline viewer. You can drag the slider in the
bottom-left corner of the window to make clips appear larger or smaller in the timeline
viewer. You may want to make the clips smaller to see more of them in the window, or
make them larger for more precise editing.
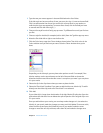
To quickly trim a clip:
m Drag from the end of the clip toward the center of the clip. (The pointer changes shape
to show where you can drag.)
The trimmed video is still present, but it won’t appear in your movie. If you decide to
lengthen the clip later, you can drag the end back out to restore all or part of the
hidden video. When you drag the edge of a clip, the adjoining clips move (or “ripple”)
along with it. Therefore, if you shorten or lengthen a clip, you shorten or lengthen your
entire movie.
Important: You can’t use this method of trimming if clip volume levels are showing.
To hide clip volume levels, choose View > Show Clip Volume Levels to remove the
checkmark. (A selected item has a checkmark next to it; you choose the item again to
deselect it.)
Timeline viewer button
Clip viewer button
Pointer