


27Routine Maintenance
Routine Maintenance
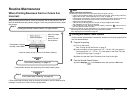
When Printing Becomes Faint or Colors Are
Incorrect
When printing becomes faint or colors are incorrect, the ink may have run out, or
the Print Head Nozzles are probably clogged. Follow the procedures below to clean
the nozzles.
If Print Head Deep Cleaning does not resolve the problem, the Print Head may be
damaged. Contact your Canon Service representative.
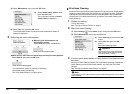
Printing the Nozzle Check Pattern
Print the nozzle check pattern to determine whether the ink ejects properly from
the Print Head Nozzles.
1 Prepare for printing.
(1) Turn on the printer.
See “Turning On/Off the Printer” on page 6.
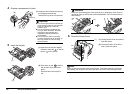
(2) Load one sheet of Canon genuine 4" x 6" / 101.6 x 152.4 mm paper or
Canon genuine 5" x 7" / 127.0 x 177.8 mm paper in the Rear Tray. See
“Loading Printing Paper” on page 8.
(3) Make sure that the Paper Thickness Lever is set to the right.
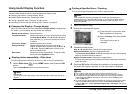
2 Print the Nozzle Check Pattern.
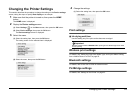
(1) Select Settings on the Home screen, then press the OK button.
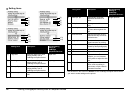
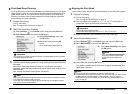
“Printing the Nozzle Check Pattern” on right column
Step 1
“Print Head Cleaning” on page 28
Step 2
If the problem remains after performing Print Head Cleaning twice.
“Print Head Deep Cleaning” on page 29
Step 3
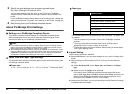
If the pattern is printed
normally, select All A.
If the print quality is poor, perform Print Head Cleaning.
After Print Head
Cleaning,
print the nozzle
check pattern.
Note
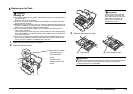
Before performing maintenance
z Open the Printer Cover and make sure that the ink lamp is lit red.
– If the ink lamp is flashing slowly, the ink tank is running low. If the printing is blurred,
replace the ink tank. See “Replacing an Ink Tank” on page 30.
If the printing is not blurred, you can continue printing for a while, but the printer may
not be able to print properly along the way. We recommend you to have a
replacement ink tank available.
– If the ink lamp is flashing fast, the ink tank is empty. Replace the ink tank.
See “Replacing an Ink Tank” on page 30.
– If the ink lamp is not lit, the tank is not set properly. Press the mark on the ink
tank until the tank clicks into place.
z If the print result is not your expected one, for instance, the printed photo is rough,
performing the Print Head Alignment may resolve the problem.
See “Aligning the Print Head” on page 29.