32 Routine Maintenance
4 Prepare a replacement ink tank.
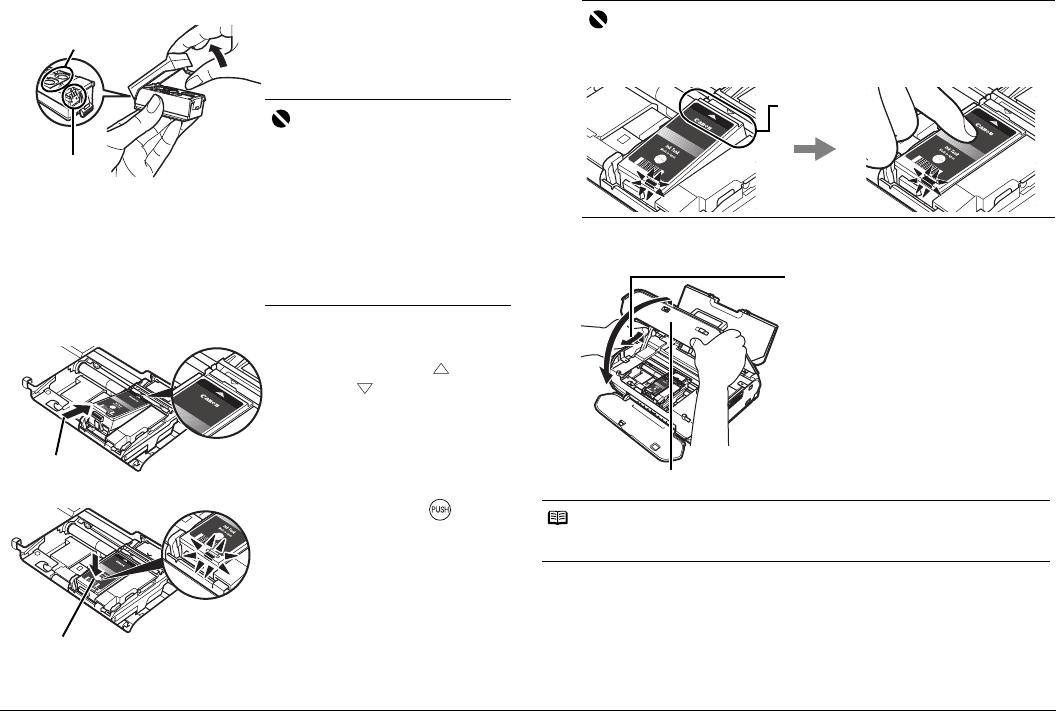
5 Insert the ink tank.
6 Close the Printer Cover.
(1) Unpack a new ink tank and remove
the orange protective cap.
Discard the cap once it is removed.
Important
z Do not touch the electrical contacts (A)
on the ink tank. Doing so can cause the
printer to malfunction or become
unable to print.
z Do not re-attach the protective cap
once you have removed it. Discard it
according to the local laws and
regulations regarding disposal of
consumables.
z Do not touch the open ink ports (B)
once the protective cap is removed, as
this may prevent the ink from being
ejected properly.
(A)
(B)
(1) Insert the new ink tank slightly
slanted to meet the
on the ink
tank to
on the printer.
(1)
(2) Push down on the mark on
the ink tank until it clicks into
place.
Ensure that the ink lamp is lit
red.
(2)
Important
If the front (innermost) part of the ink tank (A) is sticking up, push down on
the Canon logo on the ink tank as illustrated below. Do not remove the ink
tank forcibly.
Note
When you start printing after replacing the ink tank, Print Head Cleaning is performed
automatically. Do not perform any other operations until Print Head Cleaning finishes.
(A)
(1) Lift the Printer Cover and pull the
Lock Bar close.
(2) Close the Printer Cover firmly
until it clicks into place.
(2)
(1)


