28 Routine Maintenance
(2) Select Maintenance, then press the OK button.
(4) Select Yes, then press the OK button.
The nozzle check pattern is printed and the confirmation screen of
patterns is displayed.
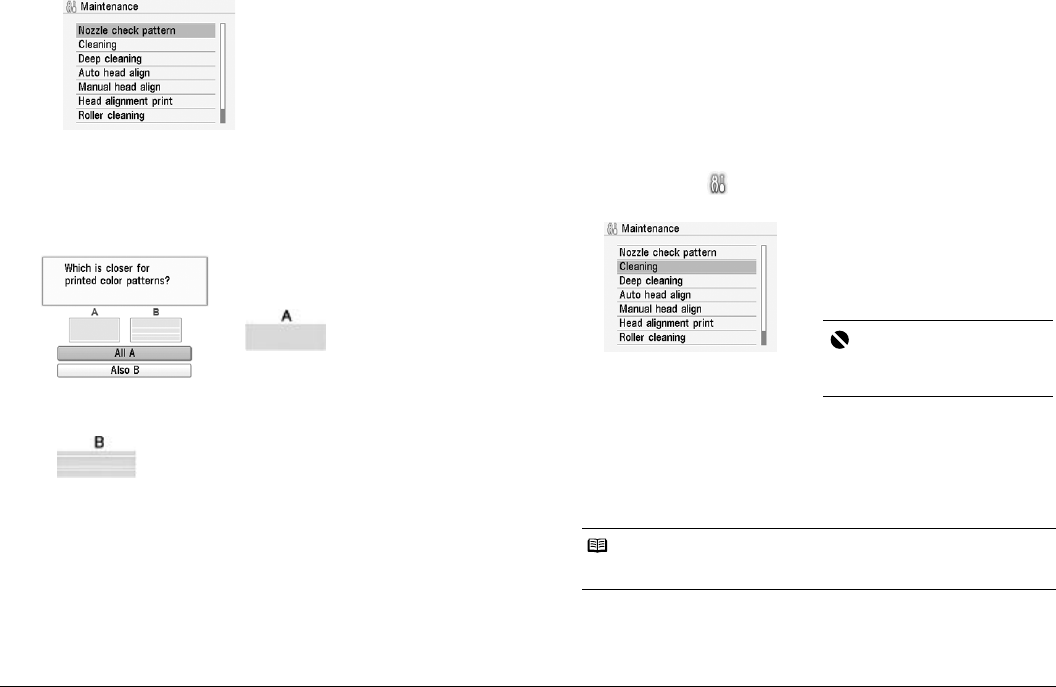
3 Examining the nozzle check pattern.
z When there is more than one white stripe on the print check patterns:
Select
Also B
, then press the
OK
button
The confirmation screen of Cleaning is displayed.
Select Yes to start the cleaning.
See “Print Head Cleaning” on right column.
Print Head Cleaning
Clean the Print Head if white streaks appear in the printed nozzle check pattern.
Cleaning unclogs the nozzles and restores the print head condition. Note that
cleaning the Print Head causes used ink to be absorbed in the ink absorber.
Cleaning the Print Head consumes ink, so perform Print Head Cleaning only
when necessary.
1 Prepare for printing.
Turn on the printer.
See “Turning On/Off the Printer” on page 6.
2 Start Print Head Cleaning.
(1) Select Settings on the Home screen, then press the OK button.
(2) Select Maintenance, then press the OK button.
3 Print the nozzle check pattern to verify that the Print Head Nozzles
are clean.
When Print Head Cleaning finishes, the confirmation message is displayed.
Select Yes to print the Nozzle Check Pattern, and verify the Print Head
Nozzles.
See “Printing the Nozzle Check Pattern” on page 27.
(3) Select Nozzle check pattern, then
press the OK button.
The confirmation screen of Nozzle
check pattern is displayed.
z When all print check patterns are
successfully printed:
Select All A, then press the OK button.
When no white stripes appear
When white stripes appear
Note
If the problem remains after performing Print Head Cleaning twice, try Print Head
Deep Cleaning.
(3) Select Cleaning, then press the OK
button.
(4) Select Yes, then press the OK
button.
Print Head Cleaning starts.
Important
Do not perform any other operations
until the Print Head Cleaning finishes.
This takes about 1 minute.


