


Wi-Fi Functions 131
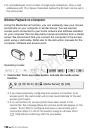
• When the wireless connection is successfully established, the
[To Web Service] screen will appear on the camcorder’s screen.
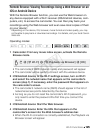
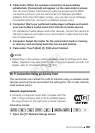
2 Select the desired Web service.
When you select (e-mail), the list of registered e-mail addresses will
appear. Select the e-mail addresses to which you want to send an e-
mail notification.
3 Touch the type of upload (AVCHD movie, MP4 movie or photo)
and the memory on which the desired recordings are saved.
4 Touch the scene or photo(s) to upload.
• When uploading photos, you can touch up to 10 photos to upload at
a time. When you have finished selecting, touch [OK].
Touch a selected photo to remove it from the selection. To cancel the
selection, touch [Remove All] > [Yes].
• If you are uploading to YouTube, read the YouTube agreement
carefully and touch [I Agree] if you agree.
• The upload will begin automatically.
• You can touch [Stop] to cancel the wireless transfer while it is in
progress.
5Touch [OK].
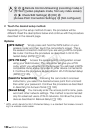
NOTES
• For movies, you can upload one at a time; for photos, up to 10 at a
time. The maximum size and length of movies you can upload will vary
depending on the Web service used.
• Depending on the access point’s (wireless router’s) settings and capa-
bilities, it can take some time to upload files.
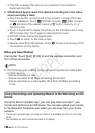
Checking your uploads using CANON iMAGE GATEWAY
Library
You can check the movies and photos you have uploaded to
CANON iMAGE GATEWAY on the Library screen and on the vari-
ous online albums. On the Library screen, you can also check what
files you have sent and the various settings for the Web services.
For details on CANON iMAGE GATEWAY, refer to the Help module
(in the upper right of the screen).
COPY