


Wi-Fi Functions 135
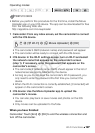
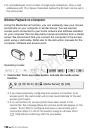
Wi-Fi Protected Setup (WPS)
If your access point is WPS-compatible (bears the
logo shown on the right), connecting the cam-
corder to it can be very easy. If you cannot suc-
cessfully connect the camcorder using WPS, try
using the [Search for Access Points] method. Refer also to the access
point’s (wireless router’s) instruction manual.
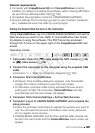
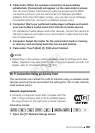
1 [WPS: Button] method
Press and hold the WPS button on the wireless router.
• Depending on the router, the amount of time required may differ.
• Make sure the router’s WPS function is activated.
[WPS: PIN Code] method
From a computer or similar device connected to the access point, use
the Web browser to open the router’s WPS settings screen. After the
8-digit PIN code appears on the camcorder’s screen, enter it into your
router’s WPS settings screen.
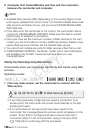
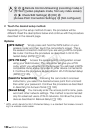
2 Within 2 minutes, touch [OK] on the camcorder’s screen.
• The camcorder will connect to the access point.
• You can touch [Stop] and then [OK] to interrupt the Wi-Fi Protected
Setup while it is in progress.
• When the Wi-Fi Protected Setup is finished, [Configuration
completed] will appear on the screen.
3 Touch [OK] to save the configuration.
• If you were in the process of performing another procedure, the
camcorder will automatically connect to the access point. Return to
the procedure of the function you were previously using:
Step 6 in
Streaming via Wi-Fi and Internet (Monitor while Out)
(A 122); Step 2 in
Sharing Your Recordings Using Web Services
(A 130); Step 2 in
Wireless Playback on a Computer
(A 132).
• Otherwise, touch [K] > [X] to close the menu.
COPY