15
Cover
Contents
Part Names
Print Settings
Printing via USB
Cable
Troubleshooting
Appendix
Printing via Wi-Fi
Basic Operations
6 Print.
Press the <p> button to start printing.
While printing, paper passes in and out
of the back of SELPHY several times.
Do not touch the paper until printing is
finished and the print is ejected onto the
paper cassette.
Do not allow 19 or more prints to
collect in the ejection area on the paper
cassette.
To cancel printing in progress, always
press the <v> button.
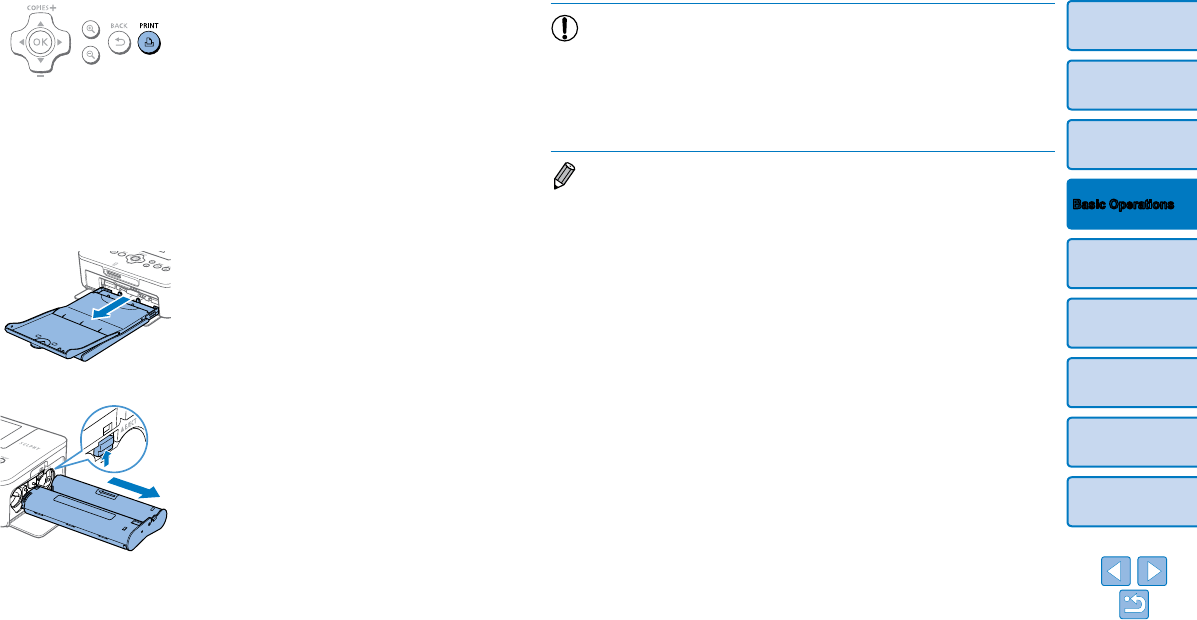
7 Add more paper as needed.
If a message indicates that the paper
has run out, remove the paper cassette
without turning off the power.
Add more paper to the cassette (=
9)
and reinsert the cassette in SELPHY
(=
10).
8 Change the ink cassette as
needed.
If a message indicates that the ink
has run out, open the ink cassette
compartment cover without turning off the
power.
To remove the ink cassette, move the
lock in the direction shown. Insert a new
ink cassette (=
8, 10).
•Never pull out the paper cassette, open the ink cassette
compartment cover, or remove a memory card while printing or
when you hear printer operation sounds immediately after it has
been turned on. This may damage the printer.
•To cancel printing in progress, always press the <v> button.
Printing cannot be canceled by pressing the <q> button, and
unplugging the printer may damage it.
• Image display in step 4 may take some time when memory cards contain
many images.
• If a message indicates that DPOF images remain, see “Printing Using Camera
Settings (DPOF Print)” (=
52).
• You can specify up to 99 images in step 4 and up to 99 prints per image in
step 5. However, the total number of prints cannot exceed 999.
• Even if you press the <v> button to cancel printing, the printer will continue
printing until the current sheet is finished.


