35
Cover
Contents
Part Names
Basic Operations
Print Settings
Printing via USB
Cable
Troubleshooting
Appendix
Printing via Wi-Fi
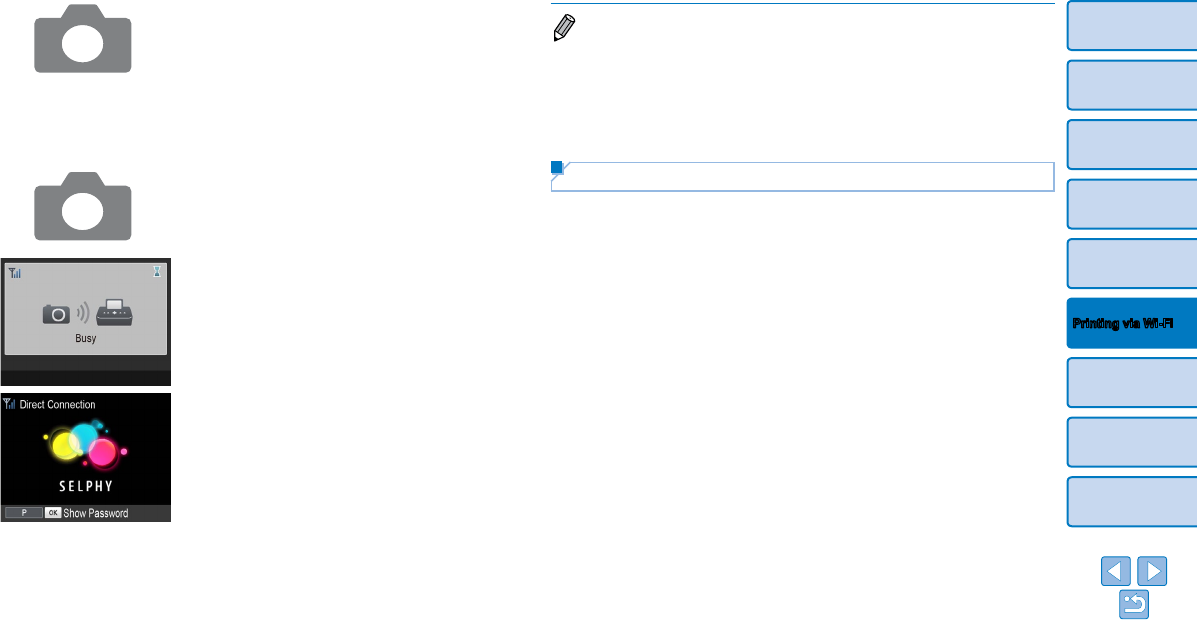
5 Use the camera to join the
network displayed on the printer
screen.
In the camera’s Wi-Fi settings, select the
SSID (network name) displayed on the
printer.
Enter the password displayed on the
printer into the password field.
6 Use the camera to print.
Use the camera to select images and
print.
Once printing begins, the screen at left is
displayed.
Do not disconnect the devices while this
screen is displayed. Images may not be
printed correctly or completely.
The standby screen at left is displayed
when the camera is no longer connected.
• Printing in progress cannot be canceled from SELPHY by using the <v>
button. Use the camera to stop printing.
• You can also connect the printer to a camera via an existing access point. In
this case, connect the printer and camera to the same access point. For details
on how to connect the printer to an access point, see “Connecting the Printer
to the Access Point” (=
37).
• The printer does not enable communication between the devices connected
to it.
Subsequent Printing
• Once you have completed the connection settings (=
34 – 35), the
second, standby screen in step 6 is displayed automatically when you
turn on the printer. To print, after the standby screen is displayed, simply
use the camera as described in steps 5 – 6.
• During standby-screen display, you can view the SSID and password by
pressing the <o> button. You can also change the password on the
screen displayed by pressing the EDIT button (=
45).
• Even during standby, you can print images on a memory card by
inserting the card to access the screen in step 4 on =
14.


