


50
Cover
Contents
Part Names
Basic Operations
Print Settings
Troubleshooting
Appendix
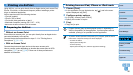
Printing via Wi-Fi
Printing via USB
Cable
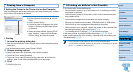
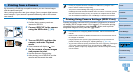
Printing from the Computer
1 Prepare SELPHY.
Remove any inserted memory cards or
USB flash drives.
Insert a loaded paper cassette and an ink
cassette in SELPHY (=
8 – 10).
If the printer and computer are not
connected yet, turn off the printer
momentarily, connect it to the computer
via USB (=
50), and then turn on the
printer again.
2 Access the printing dialog box.
Start the photo software, select images to
print, and access the printing dialog box.
As the destination printer, select [Canon
(SELPHY) CP910].
3 Choose printing options.
Choose a paper size corresponding
to the size of paper and ink cassettes
in SELPHY. Also choose bordered or
borderless printing as an option with the
listed paper sizes.
Choose the printing orientation and
number of copies, as desired.
4 Print.
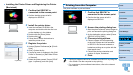
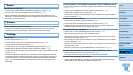
3 When the screen at left is
displayed, prepare the printer
and connect it to the computer.
Turn off SELPHY and remove any
inserted memory cards or USB flash
drives.
Insert a loaded paper cassette and an ink
cassette in SELPHY (=
8 – 10).
Use the USB cable to connect SELPHY
to the computer. For instructions, refer to
the computer or cable user manual.
4 Turn on the printer to complete
the installation process.
Press the <q> button to turn on
SELPHY.
The printer driver is installed.
Installing the Printer Driver (Macintosh)
Insert the included CD-ROM in the
computer and double-click the disc icon
on the desktop or in the sidebar.
Double-click the [Driver] folder.
Double-click [ ].
Follow the instructions displayed to
complete installation.
USB cable, sold separately