23
Cover
Contents
Part Names
Basic Operations
Printing via USB
Cable
Troubleshooting
Appendix
Printing via Wi-Fi
Print Settings
Adjusting Settings
You can enhance images in several ways before printing. Add the shooting
date, adjust colors, and more. Settings apply to all images, so there is no
need to adjust each image individually.
Configurable Items Description
Print Finish (=
24)
Choose the surface finish of prints.
Borders (=
24)
Print images with or without a border.
Page Layout (=
25)
Choose the number of images per sheet.
Image Optimize (=
26)
Automatically correct images, for optimal quality.
Brightness (=
26)
Adjust image brightness in a range of –3 to +3.
Smooth Skin (=
27)
Make skin appear smooth and beautiful.
My Colors (=
27)
Choose special color tones to make prints look
distinctive, or choose sepia or black-and-white prints.
Correct Red-Eye (=
28)
Correct images affected by red-eye.
Date (=
28)
Add camera shooting dates when you print.
Date Format (=
29)
Adjust the date format.
Auto Power Down (=
29)
Specify automatic power-off when the printer is idle.
Language (=
12)
Change the language of menus and messages.
Configuring Settings
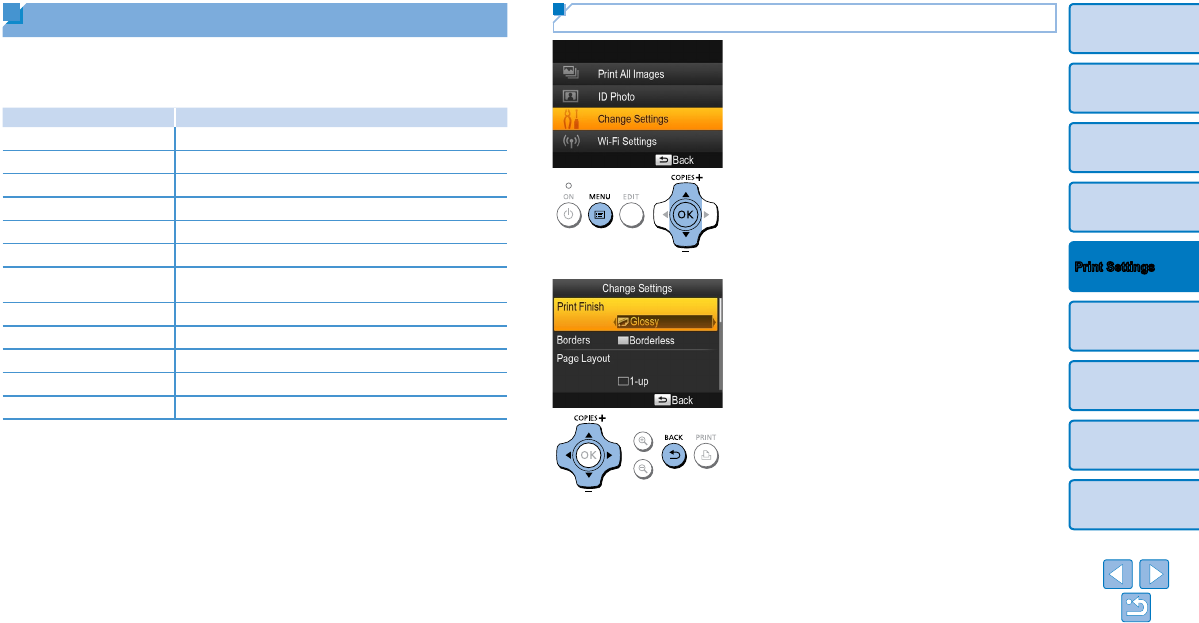
1 Access the setting screen.
Press the <k> button.
Press the <u><d> buttons to select
[Change Settings], and then press the
<o> button.
2 Select an item and adjust the
setting.
Press the <u><d> buttons to select an
item.
Press the <l><r> buttons to adjust the
settings, and then press the <v> button
to confirm your choice.
Press the <v> button again to return to
the image display screen.
See =
24 – 29 for details on each
feature.
3 Print.
Select the images (=
14) and the
number of prints (=
14), and then
press the <
p
> button to print.


