


38
Cover
Contents
Part Names
Basic Operations
Print Settings
Printing via USB
Cable
Troubleshooting
Appendix
Printing via Wi-Fi
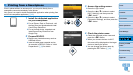
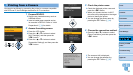
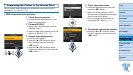
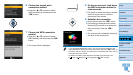
6 Choose the access point
connection method.
Press the <u><d> buttons to select
[WPS Connection], and then press the
<o> button.
7 Choose the WPS connection
method.
Press the <u><d> buttons to select
[PBC Method], and then press the <o>
button.
The screen at left is displayed.
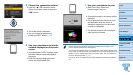
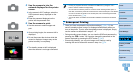
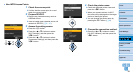
8 On the access point, hold down
the WPS connection button for
a few seconds.
For details on where the button is located
and how long to press it, check the
access point user manual.
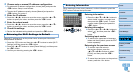
9 Establish the connection.
On the printer, press the <o> button.
[Connecting] is displayed on the printer,
followed by [Connected to access point]
when connected. Press the <o>
button.
The screen at left is displayed, indicating
the name of the access point.
• If you selected [PIN Method] in step 7, use the computer to specify the PIN
code (displayed on the printer) on the access point, press the <o> button on
the printer, and go to step 9. For instructions on configuring PIN codes, refer to
the access point user manual.
• On SELPHY, wireless signal strength is indicated by the following icons.
[
] High, [ ] Medium, [ ] Low, [ ] Weak, [ ] Out-of-range