


100
8-4 VF
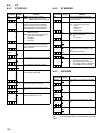
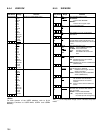
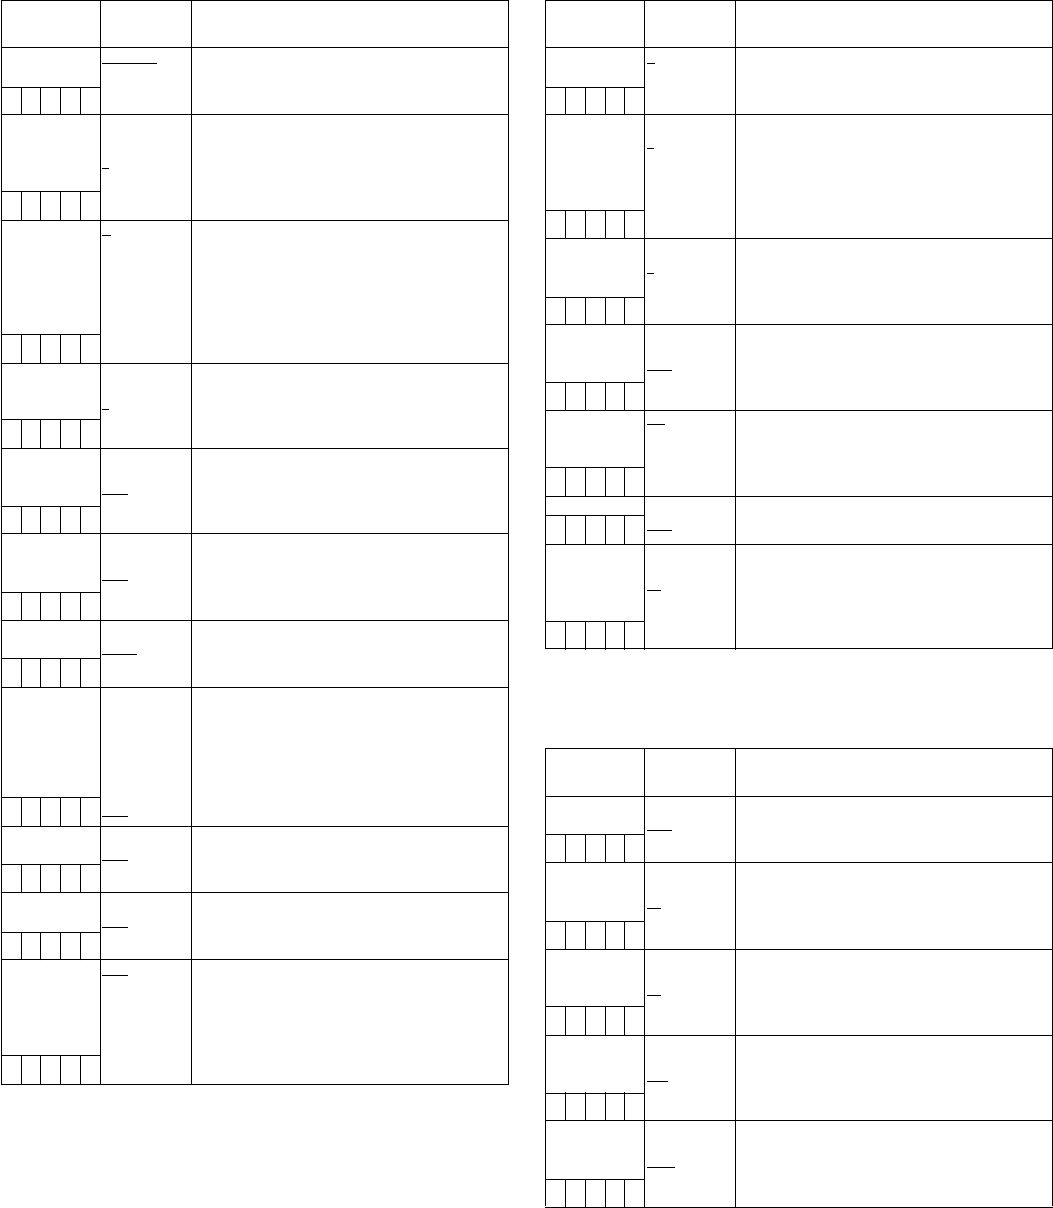
8-4-1 VF DISPLAY 8-4-2 VF MARKER
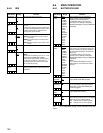
8-4-3 USER BOX
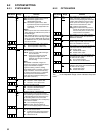
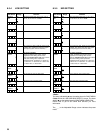
The ____ in the Adjustable Range column indicates the preset
mode.
Items/
Data Saved
Adjustable
Range
Remarks
DISP
CONDITION
NORMAL
HOLD
NORMAL
: Display status constantly.
HOLD: Display status only when the
MODE CHECK switch is pressed.
–CUFE
DISP MODE 1
2
3
Set the DISP MODE.
Switch the camera’s Warning/Message
indication. Please refer to [4-7-4 Display
Modes and Setting Changes/adjustment
Result Messages] for more information.
–CUFE
VF OUT Y
NAM
R
G
B
Select the VF output.
Y: Brightness signal
NAM: Output signal with the highest level
among R, G, and B signals.
R: Rch signal
G: Gch signal
B: Bch signal
–CUFE
VF DTL 0
:
3
:
5
Select the VF DTL.
Additionally enhance the DTL for the VF
signal. 0 setting is the same DTL as the
primary scan lines.
–CUFE
ZEBRA1
DETECT
0%
:
70%
:
109%
Set the ZEBRA1 detection level (IRE value).
–CUFE
ZEBRA2
DETECT
0%
:
85%
:
109%
Set the ZEBRA2 detection level (IRE value).
–CUFE
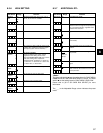
ZEBRA2 ON
SPOT
OFF
Set the ZEBRA2 to ON, OFF, or SPOT.
–CUFE
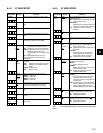
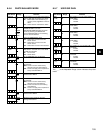
LOW LIGHT LVL OFF
10%
15%
20%
25%
30%
35%
Set the camera incoming light volume at
which to display LOW LIGNT.
–CUFE
ECU MENU
DISP.
ON
OFF
Set the menu display on the VF to ON or
OFF when the ECU is connected.
–CUFE
50M
INDICATOR
ON
OFF
Set the 50M recording indication to ON or
OFF.
–CUFE
MARKER/CHAR
LVL
50%
60%
70%
80%
90%
100%
Adjust the brightness of markers and
characters displayed on the VF.
–CUFE
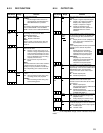
Items/
Data Saved
Adjustable
Range
Remarks
TA BLE A
B
Select the VF MARKER setting table.
First, select table A or B, then set the items
below for each table.
–CUFE
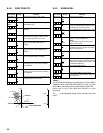
CENTER MARK OFF
1
2
3
4
Switch the center mark.
OFF: Do not display center mark.
1: + (large)
2: Hollow (large)
3: + (small)
4: Hollow (small)
–CUFE
SAFETY ZONE OFF
1
2
Select the frame type for the safety zone.
OFF: Do not display frame.
1: Box
2: Corner frame
–CUFE
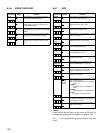
SAFETY AREA 80%
:
90%
:
100%
Set the position of the safety zone.
–CUFE
FRAME SIG 4:3
13:9
14:9
VISTA
Set the frame marker.
Only enabled when REC MODE is set to
16:9.
The VISTA ratio is 16:8.65.
–CUFE
FRAME MARK ON
OFF
Set the frame marker to ON or OFF.
–CUFE
FRAME LVL 0
:
15
Set the level outside the frame marker.
0: Equivalent to signal OFF.
15: Same brightness as center area.
This setting, however, is disabled if
the FRAME SIG is set to VISTA.
–CUFE
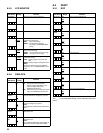
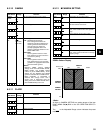
Items/
Data Saved
Adjustable
Range
Remarks
USER BOX ON
OFF
Select whether or not to display the USER
BOX.
–CUFE
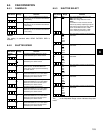
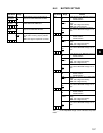
USER BOX
WIDTH
1
:
13
:
100
Set the width of the USER BOX.
–CUFE
USER BOX
HEIGHT
1
:
13
:
144
Set the height of the USER BOX.
–CUFE
USER BOX H
POS
–50
:
+00
:
+50
Set the horizontal position of the USER
BOX.
–CUFE
USER BOX V
POS
–144
:
+000
:
+144
Set the vertical position of the USER BOX.
–CUFE