


24
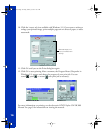
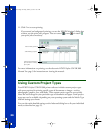
3. Choose the Media Type and Ink settings you want to use. These settings are the
same as the ones you selected on the main printer settings dialog box. You can
change them here as you customize your settings, if needed.
The available Print Quality settings may be limited by the
Media Type you choose.
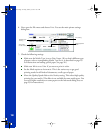
4. Choose one of the following Print Quality options:
■ Economy: For low-resolution rough drafts on plain paper. Saves ink.
■ Normal - 360 dpi: For most documents on plain paper, transparencies, or
360 dpi Ink Jet Paper.
■ Fine - 360 dpi: For high-speed, high-quality output.
■ Photo - 720 dpi: For excellent high-resolution output.
■ Photo - 1440 dpi: For the highest-resolution output.
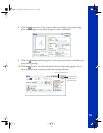
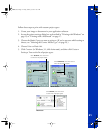
5. Choose one of the following Halftoning options:
■ No Halftoning: Select when printing black text only.
■ Error Diffusion: For printing photographic images. Blends each color dot with
the dots around it.
■ Fine Dithering: For printing graphs or other images that require precise, solid
areas of bright colors.
6. Choose any of the following print options:
■ MicroWeave: This option is automatically selected or disabled by the Print
Quality you choose and is not user selectable. MicroWeave prints in finer
increments to eliminate unwanted banding (light horizontal lines).
■ High Speed: For fast, bidirectional printing.
■ Flip Horizontal: For printing a mirror image of your document. Use with
iron-on transfer paper so your ironed-on printout will read correctly.
■ Finest Detail: For printing text, graphics, and line art with very sharp edges.
Slows print speed and requires additional memory.
basics.book Page 24 Friday, January 8, 1999 11:57 AM