


46
6. SETTING AND ADJUSTMENTS BEFORE SHOOTING
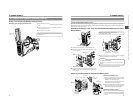
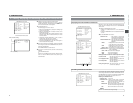
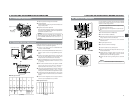
White Yellow Cyan Green Magenta Red Blue
Blue Black Magenta Black Cyan Black White
Black White Black
1 2345 6
8 90AB C
EF G HIJK
7
D
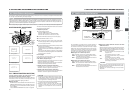
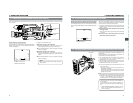
1.
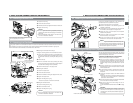
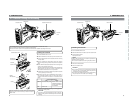
Adjust the position and angle of the viewfinder.
2.
Diopter adjustment
Rotate the eyepiece focusing ring until the viewfinder screen
image is clearly visible.
3.
Brightness and contrast adjustment
When the ambient brightness changes, etc., the brightness
and contrast of the viewfinder screen can be adjusted with
the BRIGHT and CONT controls.
MEMO:
The screen size of the viewfinder can be changed by
selecting the desired size with the ASPECT RATIO item
on the CAMERA OPERATION menu screen (4:3 or
LETTER).
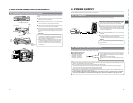
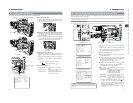
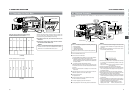
■SMTPE type color bars
Display the camera built-in color bar signal on the video monitor
and adjust the colors, contrast and brightness.
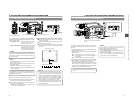
1.
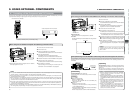
Connect a color video monitor to the MONITOR OUT
connector of the GY-DV5000.
2.
Set the COLOR BARS/CAMERA/AUTO KNEE switch to
BARS to output the color bar signal (SMTPE type color
bars).
3.
Set the monitor’s BLUE CHECK function to ON while the
color bars are being displayed so that the screen turns
entirely blue and the color bars become blue stripes.
4.
Adjust the CHROMA control of the monitor so that there is
no difference in brightness between the color bars 1 and
8, 7 and D.
5.
With the BLUE CHECK function ON, adjust the PHASE
control of the monitor so that there is no difference in
brightness between the color bars 3 and 0, 5 and B.
6.
If the phase control adjustment above causes a difference
in brightness between the color bars 1 and 8, 7 and D,
start again from the CHROMA control adjustment in step
4
.
7.
Set the monitor’s BLUE CHECK function to OFF to switch
the monitor back to the standard screen (R, G and B will all
appear).
8.
Use the monitor's brightness control to adjust so that the
color bars H and I disappear but J is visible.
6-3 Viewfinder Adjustment
6-4 External Monitor Adjustment
BRIGHT
3.
3.
2.
1.
1.
1.
Eyepiece
CONT
2.
Eyepiece
focusing ring
PUSH
LINE OUT
Y/C OUT
CH-1
CH-2
MONITOR OUT
POWER
ON OFF
VTR
3.~8.
1.
2.
Color video monitor
■EBU type colour bars
(E model)(U model)
12345678
White
Yellow
Cyan
Green
Magenta
Red
Blue
Black
47
6. SETTING AND ADJUSTMENTS BEFORE SHOOTING
M
RET
WT
A
MACRO
4.
6. 5.
3.
1.
7.
8.
10.2.
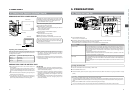
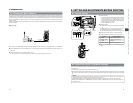
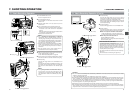
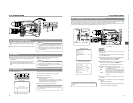
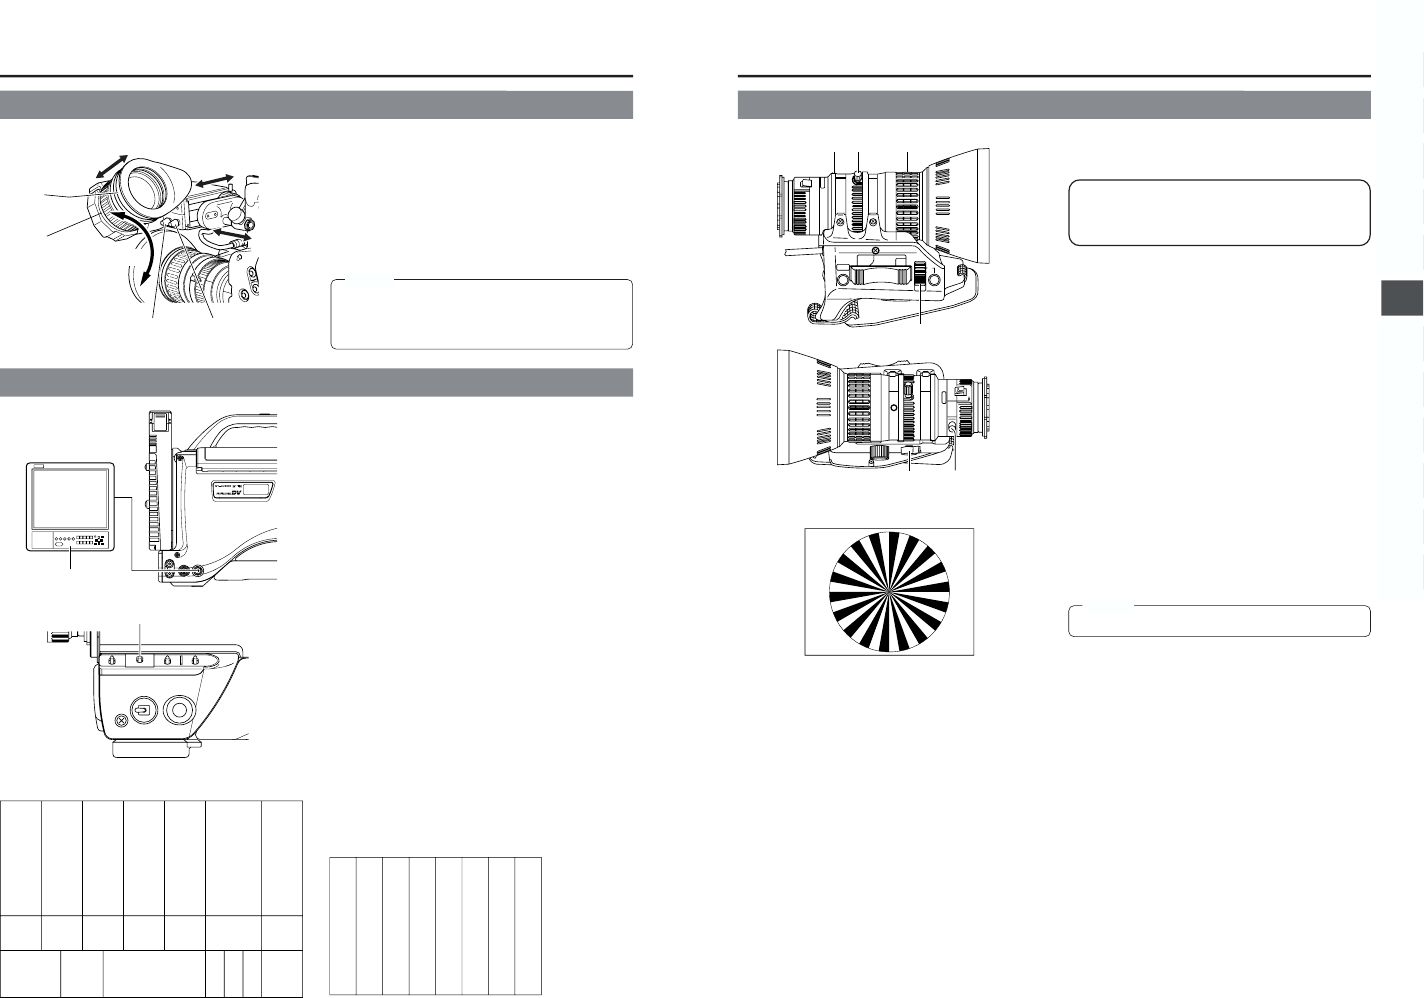
6-5 Back Focus Adjustment
Siemens star chart
It is only necessary to perform this when the lens is attached
for the first time or when focusing is not correct in both the
telephoto and wide-angle positions.
It is easier to adjust back focus when the subject is more
than 3 meters from the camera.
The optimal subject for this adjustment is a Siemens star
chart.
1.
Set the IRIS mode switch to M (Manual).
2.
Set the zoom mode to M (Manual).
3.
Open the iris by turning the iris ring. If the illumination is too
strong, reduce it or move to a darker place.
4.
Turn the zoom lever until the lens is at the maximum
telephoto position.
5.
Bring the subject into focus.
6.
Set the lens to maximum wide-angle.
7.
Loosen the back focus ring retaining knob.
8.
View the same subject and adjust the back focus ring for
the best possible focus.
9.
Repeat steps
4
. through
8
. about three times for fine
adjustment until the subject remains in focus in both the
telephoto position and the wide-angle position.
10.
Tighten the back focus ring retaining knob to secure the
ring.
MEMO:
ACCU FOCUS can also be used in the above step
3
.