


56
3-1 Starting Up V.Networks Controller
Settings (Step 3 Setting Using the V.Networks Controller)
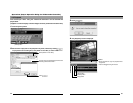
The installed "V.Networks Controller" can be used to monitor camera images.
In addition, recording/playback operations and setting of frame rate for camera
images are also possible.
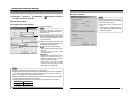
1.
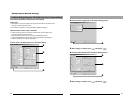
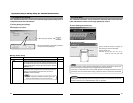
Select [Start] † [Programs] † [V. NETWORKS] † [V.Networks Controller] to
start up the "V.Networks Controller".
2
Live images from the camera will be
displayed.
2
1
Select the camera to connect to from the
pull-down menu for the camera.
Notes
● Enter the correct password if a password has been set.
● This controller can be connected to VN-C1, VN-C2, VN-C3, VN-C30 (JPEG only), VN-A1,
VN-C10 (JPEG and MPEG), VN-C655 and VN-C625 as well VN-C205.
57
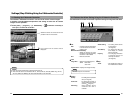
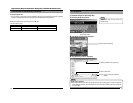
3-2 Features that Allow Setting Using the V.Networks Controller
The V.Networks Controller can be used to perform settings for image size and alarm.
1 2 43
1
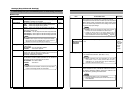
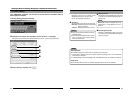
File
New : Creates a new file if the camera
is connected for the first time.
Delete : Deletes a file.
Motion Detection Standby
: Select the camera for which
the Motion Detection Standby
function is to be enabled.
Exit : Exits the controller.
2
View
Image Size : Sets the image display size.
JPEG : 640 x 480
320 x 240
Upside Down: Displays the image inversely.
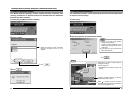
3
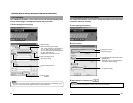
Setting
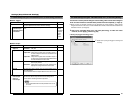
Quality :
For setting the compression
rate. (
☞
Page 60)
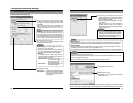
Frame rate :For setting the number of
camera images to send per
second. (
☞
Page 61)
Alarm Reg : Alarm operation will be
enabled if this item is
checked.
Alarm Setting :For setting alarm actions
for each alarm.
(
☞
Page 62)
Time Stamp : For setting the date and
time display of a stored
file.(
☞
Page 64)
Property :For changing information
of cameras that are not
currently connected.
(
☞
Page 65)
4
Help
About :For checking the version of
the V.Networks Controller.
Note
The video output is not inverted.