


Maintaining the Equipment
May 2002 4-5
6. Replace the balance filters:
a. Remove the 3 screws.
b. Remove the filter retainer.
c. Remove the old filters and place the new filters in the filter holder.
The filters are coated on both sides. It is not important which side faces up
or down.
d. Secure the filters with the retainer and the 3 screws.
7. Install the filter assembly in the scanner with the balance-filter selection
handle in the middle.
8. Reinstall the lamp cover, tighten the thumbscrews, and select a filter position.
9. Calibrate the scanner (see Calibrating the Scanner on page 3-5).
Replacing the (Square) IR Filter
IMPORTANT: The IR filter is made of glass and is expensive to replace. It is not
included in the product warranty or service contract. Use care
when handling the IR filter.
Wear white cotton gloves for this procedure.
It is not necessary to power down the scanner before changing the IR filter.
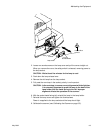
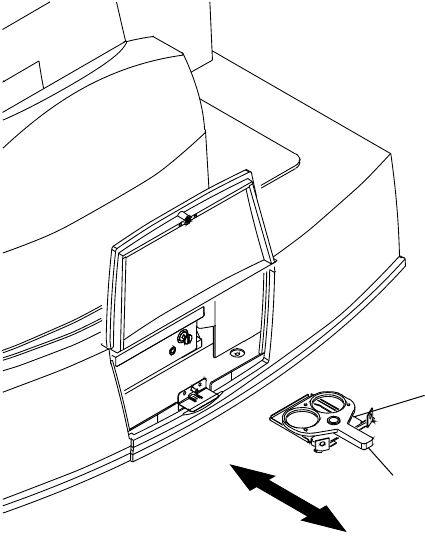
1. Open the lamp-and-filter-access door (see page 4-4 for the location of the
lamp-and-filter-access door).
2. Loosen the thumbscrews on the lamp cover and pull the cover straight out.
When you remove the cover, the safety switch is released, removing power to
the lamp socket.
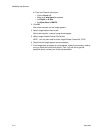
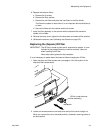
NEG
POS
red handle
IR filter (under balance-
filter assembly)