


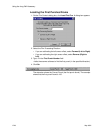
Using the Long Roll Accessory
D-22 May 2002
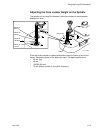
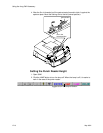
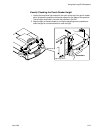
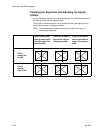
Adjusting the Punch Reader Height
Adjust both the left and right reader heights such that the punch reader fully
distinguishes between a data hole and film.
No specific numbers represent data holes or film, but lower numbers indicate the
presence of film and higher numbers indicate the presence of data holes. (See
Recording the Highest Numbers on the LEDs on page D-31 for the location of the
LED numbers.)
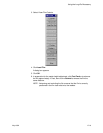
For both the left and right readers:
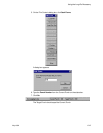
1. On the Film Controls window, click Position > several times to advance the
film. As you advance the film, the reader should sense both holes and film.
If you do not see a significantly higher number after you see data holes,
repeat Visually Checking the Punch Reader Height on page D-21
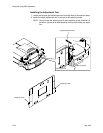
2. When you see a significantly higher number, stop advancing the film. Turn the
adjusting screw until the number is maximized.
For example, as you click Position >, you may see a value of 580, but when
you stop advancing the film and turn the adjusting screw, you may see a value
of 620. This indicates a more effective reader height.
3. Repeat steps 1 and 2 to advance the film to another position and confirm your
adjustment.
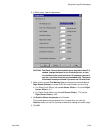
4. From SAM, turn the lamp on.
When the above procedures have been completed, you can begin scanning. Use
your Kodak Professional Digital Print Production Software (DP2) (help is included)
to produce quality scans.
IMPORTANT: Remember to recalibrate the scanner for each roll of film. Use a
camel’s hair brush and canned air to remove dirt or dust from the
light bar.