


101
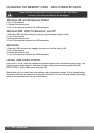
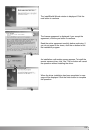
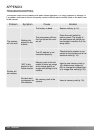
Use the left/right keys of the controller to
display the image to be printed.
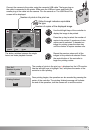
Printing finished.
The number of prints in the print run is displayed on the LCD monitor.
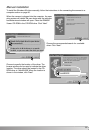
Use the left/right keys to highlight “Yes,” and press the center of the
controller to start printing.
Print file?
Number of prints: 7
Yes No
Repeat the previous steps until all the
images to be printed are selected. Press
the central button of the controller to
begin the printing routine.
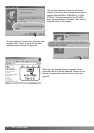
Press the up key to select the number of
copies to be printed. A maximum of nine
copies can be selected.To deselect an
image for printing, press the down key
until the number of copies reaches zero.
Once printing begins, the operation can be canceled by pressing the
center of the controller.The printing finished message will indicate
the end of the operation; turn the camera off to end the routine.
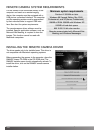
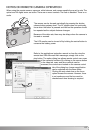
The button switches between the single
frame and index playback formats.
OK
Number of prints in the print run.
Number of copies of the displayed image.
Strike through indicates unprintable
file type.
:move :sel. :print
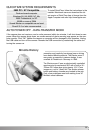
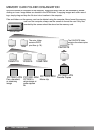
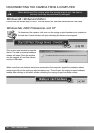
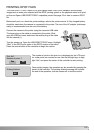
Connect the camera to the printer using the camera’s USB cable.The larger plug on
the cable is connected to the printer. Slide open the USB-port cover and insert the
smaller plug of the cable into the camera.Turn the camera on.The USB Direct Print
screen will be displayed.