


8 VQT2P49 VQT2P49 9
Charging battery Using theTouch Panel
Always charge before first use! (not sold pre-charged)
■
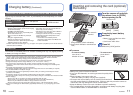
About batteries that you can use with this unit
It has been found that counterfeit battery packs which look very similar to the
genuine product are made available to purchase in some markets. Some of
these battery packs are not adequately protected with internal protection to
meet the requirements of appropriate safety standards. There is a possibility
that these battery packs may lead to fire or explosion. Please be advised that
we are not liable for any accident or failure occurring as a result of use of
a counterfeit battery pack. To ensure that safe products are used we would
recommend that a genuine Panasonic battery pack is used.
• Use the dedicated charger and battery.
• The camera has a function for distinguishing batteries which can be used
safely. The dedicated battery supports this function. The only batteries
suitable for use with this unit are genuine Panasonic products and batteries
manufactured by other companies and certified by Panasonic. (Batteries which
do not support this function cannot be used). Panasonic cannot in any way
guarantee the quality, performance or safety of batteries which have been
manufactured by other companies and are not genuine Panasonic products.
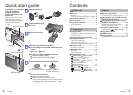
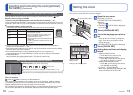
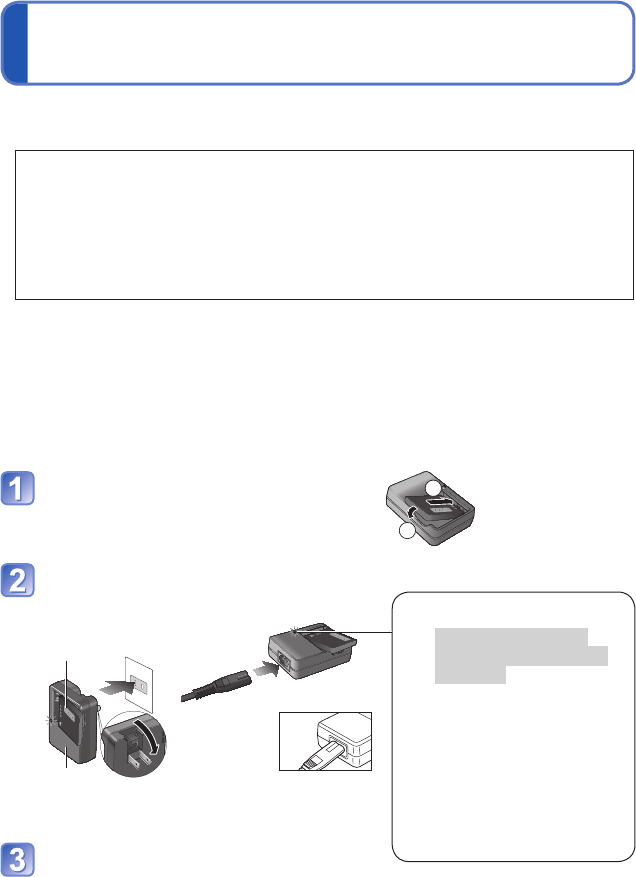
Insert the battery terminals and
attach the battery to the charger
Ensure [LUMIX] faces outwards.
1
2
Connect the charger to the
electrical outlet
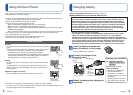
Charging light ([CHARGE])
On: Charging in progress
(approx. 110 min. if fully
depleted)
Off: Charging complete
If light is flashing:
• Charging may take longer
than normal if battery
temperature is too high or
too low (charging may not be
completed).
• Battery/charger connector is
dirty. Clean with a dry cloth.
●
Plug-in type
●
Inlet type
Battery
(model- specific)
Charger
(model - specific)
Detach the battery after charging is
completed
• The AC
cable does
not fit
entirely into
the AC input
terminal. A gap will remain.
This camera’s LCD monitor is a touch panel. Touch or drag your finger on the screen to
record, play back and make settings.
●
This touch panel detects the electrical properties of the human body (capacitive touch
panel). Touch the panel directly with your bare finger.
●
Touch the panel with the clean and dry finger.
●
The touch panel generally cannot be used;
• With a commercially available stylus pen or a gloved hand
• With wet hands or immediately after applying hand lotion
• When you use a commercially available liquid crystal protection sheet (It may impair
visibility and operability.)
•
When the both hands or more than one finger are on the touch panel at the same time
●
Do not press on the LCD monitor with hard pointed tips, such as ball point pens.
●
Do not operate with your fingernails.
●
Wipe the LCD monitor with dry soft cloth when it gets dirty.
●
Do not scratch or press the LCD monitor too hard.
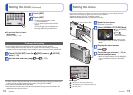
Touch operations
■
Touch
To “touch” is to press the touch panel and then pull the finger back
again.
Touching is used to select icons or pictures, among other actions.
• Touch icon near its center. If multiple icons are touched
simultaneously, the camera may not operate normally.
• Touch and release ▲▼◄► icons repeatedly until the required
value/setting is obtained. The value/setting does not change in
succession when you keep touching the icons.
■
Drag
To “drag” is to touch and slide your finger across the touch panel
surface.
During playback, if you drag your finger from the center of the
screen to the left or right, the display advances or goes back to
another picture.
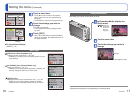
■
Effective range of touching
Touch operations do not work at the edge of the screen.
Detection area
of the sensor
(approximation)
●
During touch operations, hold the camera securely so it does not drop.
●
If a screen icon, etc. does not respond when touched, change the position that you are
touching slightly and try the operation again.