61
Installing the Camera in a High Position
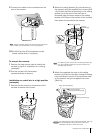
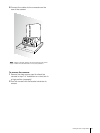
9 Connect the cables to the connectors on the
rear of the camera.
Take the proper steps to ensure that the load of the
cables connected does not cause problems.
Note
10 The SONY and/or HD nameplates can be
turned upside down, if necessary.
To remove the camera
1 Remove the three screws used to attach the
camera in step 8 of “Installation on a ceiling
(example).”
2 Turn the camera with the bracket
counterclockwise to remove.
Installation on a shelf, etc. in a high position
(example)
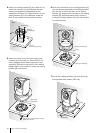
1 Remove the four screws on the bottom of the
camera to remove the four feet.
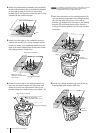
2 Attach the ceiling bracket (A) to the bottom of
the camera using the supplied four screws (3M3
× 8). Position the hole for screwing on the ceiling
bracket (A) to the front of the camera as
illustrated, align the screw holes on the ceiling
bracket with those on the bottom of the camera,
then attach the bracket to the camera.
For attaching the camera to the ceiling bracket, use
only the supplied screws. Using other screws may
damage the camera.
Note
3 Attach the supplied wire rope to the ceiling
bracket (A). Pass the wire rope through the fixing
hole and attach its end to the attachment hole
on the bracket using the supplied one screw
(3M4 × 8).
For attaching the wire rope to the bracket, use only
the supplied screw. Using another screw may
disable the function of the wire rope.
Caution
Ceiling
Ceiling
bracket (A)
M3 x 8 (supplied)
Front of
camera
Ceiling bracket (A)
Fixing hole for wire rope
Wire rope (supplied)
M4 x 8 (supplied)


