


Changing Basic Settings
33
Recording
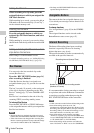
Adjusting the brightness manually
When Full Auto mode is set to OFF, set
“Exposure” (page 74) in the CAMERA SET
menu to “Manual” to use Manual mode. When
Manual mode is set, rotate the EXPOSURE dial
(page 11) to adjust the brightness. (Rotate the dial
clockwise while facing the front of the camcorder
to increase the brightness.) You can turn Manual
mode on/off by pressing the EXPOSURE button
(page 11).
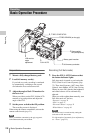
Operating Zoom manually
Setting the FOCUS/ZOOM switch (page 11) to
the ZOOM position activates ZOOM adjustment
via the lens operation ring (page 11).
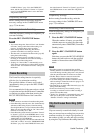
Using the Power Zoom
The power zoom lever (page 14) on the grip and
the handle ZOOM button (page 13) are activated.
The current zoom position is displayed on the
screen in the range of 0 (Wide) to 99 (Tele) when
you press the DISPLAY button.
The numerical indication can be changed to that
in a bar by changing “Zoom Position” in “Display
On/Off” (page 78) in the LCD/VF SET menu.
To adjust with the power zoom lever on the grip
Pressing the lever deeper sets zooming faster.
To adjust with the handle ZOOM button
Zooming is activated at the speed selected with
the speed switch (page 13).
The zoom speed assignment can be changed with
“Zoom Speed” (page 71) in the CAMERA SET
menu.
You can select Soft mode for zooming by using
“Zoom Transition” (page 72) in the CAMERA
SET menu, in which the zooming speed is
gradually increased at the beginning then
gradually decreased for the end.
When adjusting with the ZOOM button of the IR
Remote Commander
The zooming speed depends on the “Remote”
(page 71) setting in “Zoom Speed” in the
CAMERA SET menu.
To use the IR Remote Commander, see “Using the IR
Remote Commander” (page 21).
The infinity (∞) position has some margin to
compensate for focus change caused by variation
in ambient temperature. When shooting an image
at infinity in MF mode, adjust the focus while
observing the image on the LCD monitor/EVF
screen.
Adjusting in MF Mode
Set the FOCUS/ZOOM switch (page 11) to
FOCUS and the FOCUS switch (page 13) to
MANUAL to set the camcorder to MF (Manual
Focus) mode, which lets you activate Auto Focus
only when required.
In this mode, the one-push momentary auto focus
function and the MF Assist function are activated
only when you push the PUSH AF button (page
13).
Using the Lens Operation Ring
Rotate the lens operation ring while looking at the
LCD monitor/EVF screen to adjust the focus.
Expanded Focus
When you press the EXPANDED FOCUS button
(page 15), the center area of the picture is
magnified on the LCD monitor/EVF screen,
making the focus adjustment easier.
Press the EXPANDED FOCUS button again or
leave the lens operation ring unmoved for 5
seconds to resume the normal angle for recording.
Peaking
When you press the PEAKING button (Assign 2
button) (page 13), the peaking function is
activated, emphasizing the contours of the images
on the LCD monitor/EVF screen and making
manual focusing easier. This function does not
affect recording signals.
The emphasis level and color of the contours can
be set with “Peaking” (page 77) in the LCD/VF
SET menu.
One-Push (Momentary) Auto Focusing
When you press the PUSH AF button, auto
focusing momentarily activates. One-Push Auto
Focusing is terminated when the subject comes
into focus.
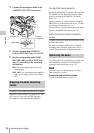
Zoom
Focus