


Clip Operations
56
Playback
In Normal playback mode, you can monitor the
recorded audio signals through the built-in
speaker (page 12) or connected headphones.
With the headphones connected to the headphone
connector (page 11), the built-in speaker is turned
off.
Press the VOLUME buttons (page 13) to adjust
the sound volume.
You can select audio channel(s) to be monitored
with “Audio Output” (page 75) in the AUDIO
SET menu.
To start playback from the top of the first clip
Press the PREV button and F REV button
simultaneously. The top of the first-recorded clip
on the memory card is cued up.
To start playback from the top of the last clip
Press the F FWD button and NEXT button
simultaneously. The top of the last-recorded clip
on the memory card is cued up.
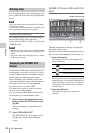
In the same manner as in recording, you can add
shot marks to the clip during playback.
At the point where you wish to add a shot
mark, press the “Shot Mark1” or “Shot
Mark2” assigned button, or the
SHOTMARK 1 or 2 button on the IR
Remote Commander.
Notes
• No shot mark can be added if the memory card is write-
protected.
• No shot mark can be added to the first or last frame of
a clip.
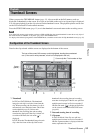
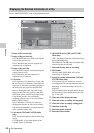
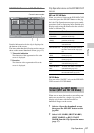
During thumbnail screen playback, etc., you can
operate the clips or confirm and change the
subsidiary data for clips using the Clip Operation
menus. The corresponding Clip Operation menu
pops up on the screens as shown below when you
press the SET/SEL button or the jog dial.
Monitoring Audio
Cueing Up
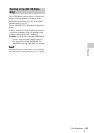
Adding Shot Marks During
Playback (UDF and FAT HD Mode)
Clip Operations
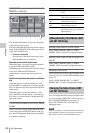
Clip Operation Menus
Thumbnail screen (page 57)
CANCEL
DISP CLIP INFO
OK MARK ADD (FAT only)
OK MARK DELETE (FAT only)
OK FLAG ADD (UDF only)
NG FLAG ADD (UDF only)
KEEP FLAG ADD (UDF only)
CLIP FLAG DELETE (UDF only)
LOCK CLIP (UDF only)
UNLOCK CLIP (UDF only)
COPY CLIP
DELETE CLIP
ALL MARKS
SHOT MARK1
SHOT MARK2
REC START MARK (UDF only)
EXPAND CLIP