


Useful Functions
37
Recording
By setting “Camera/Bars” in “Color Bars” (page
71) in the CAMERA SET menu to “Bars,” you
can output a color-bar signal in place of the
camera picture. When this item is set to
“Camera,” the output returns to the camera
picture.
A 1-kHz reference tone is output with the color
bar signal if “1KHz Tone” in “Audio Input” (page
74) in the AUDIO SET menu is set to “On.”
The color-bar signal and reference-tone signal are
also fed out from the SDI OUT, HDMI OUT,
i.LINK, VIDEO OUT (color bars only), and A/V
OUT connectors.
You can select the type of color bars with “Bars
Type” in “Color Bars” in the CAMERA SET
menu.
Notes
• The color bar mode cannot be output in Slow & Quick
Motion mode and SLS/EX SLS mode.
• You cannot switch to “Color Bars” while recording.
(Switching from “Color Bars” to “Camera” is
available.)
When you record shot marks for important scenes
of a clip recorded in UDF or FAT HD as
subsidiary data, you can access the marked points
easily on a Shot Mark screen (page 62), which
only displays scenes with shot marks only. This
increases editing efficiency.
The camcorder permits you to record two types of
shot marks: shot mark 1 and shot mark 2.
Shot marks can be recorded as needed during
recording or can be added after recording while
checking the playback pictures on the thumbnail
screen.
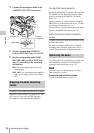
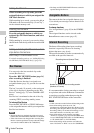
Inserting a shot mark during recording
Activate the IR Remote Commander (page 21),
and press the SHOTMARK 1 or SHOTMARK 2
button where you want to insert a shot mark. If the
Shot Mark1 or Shot Mark2 function is assigned to
an assignable button (page 38), you can also use
that button.
For operations to add shot marks after recording,
see “Adding Shot Marks During Playback (UDF and
FAT HD Mode)” on page 56 and “Adding/Deleting
Shot Marks (UDF and FAT HD Mode)” on page 62.
For operation to apply a name to a shot mark, see
“Defining Shot Mark names in Planning Metadata”
on page 51.
You can add OK/NG/KP flags to clips recorded
with UDF. By adding flags, you can set the
camcorder to display only clips with certain flag
settings on the thumbnail screen (OK/NG/KP/
None-Clip thumbnail screen) (page 54).
Note
Use the “Lock Clip” setting (page 57) to protect clips.
Adding a flag
During recording or playback, press the
assignable button to which you assigned the
Clip Flag OK/Clip Flag NG/Clip Flag Keep
function.
You can add an OK/NG/KP flag to a clip during
recording or playback.
Deleting a flag
Press the assignable button, twice in
succession, to which you assigned the Clip
Flag OK/Clip Flag NG/Clip Flag Keep
function.
You can delete the OK/NG/KP flag from a clip.
OK/NG/KP flags can also be added and deleted from
the thumbnail screen. For details, see “Adding/
Deleting a Flag (UDF Only)” (page 59).
By adding the OK mark to a clip recorded in FAT
HD Mode, you can prevent the clip from being
deleted or divided inadvertently. You can also set
the camcorder to display only clips with the OK
mark on the thumbnail screen (OK-Clip
thumbnail screen) (page 54).
Useful Functions
Color Bars/Reference Tone
Shot Marks
OK/NG/KP Flags (for UDF Only)
OK Mark (for FAT HD Mode Only)