


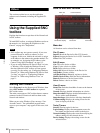

Administrating the Camera
Configuring the Viewer — Viewer Menu
90
Custom
Select the homepage to be displayed.
You can display your favorite homepage stored in the
built-in flash memory or CF memory card (not
supplied).
To store a homepage HTML file in the built-in flash
memory, use the Custom Homepage function of
SNC toolbox included in the supplied CD-ROM.
To learn how to use the Custom Homepage, see
page 100.
For details on supported cards, contact your
authorized Sony dealer.
To display your Custom homepage perform the
following operation:
1
Select Custom.
2
Type the path of the HTML file using up to 64
characters in the text box on the right of Path.
3
In Selected memory, select the memory in which
the homepage is stored.
You can select Flash memory or CF memory
card.
The directory displayed in the text box on the right
of Path changes according to the selected memory.
Tip
Even when you select Custom, the homepage inside the
camera can be displayed by typing the following URL in
the address box of your Web browser.
Example: When the IP address of the camera is set to
192.168.0.100
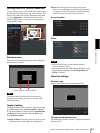
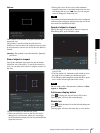
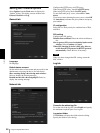
Header
Configure the setting for the bar menu displayed at the
top of the viewer screen. Select On to display the header,
and Off to hide it.
Button style
Select Standard or Simple.
Logo URL
To set the logo image, click Browse and specify the
URL of the logo image to display.
Background color 1, background color 2, and
Text color
Specify the background colors and font color.
To specify the color, enter “#” followed by an RGB
value in 6-digit hexadecimal.
The first 2 digits after # represent red, the next 2 digits
green, and the last 2 digits blue. Specify the brightness
for each color. 256 brightness levels are available
(00-FF).
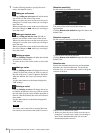
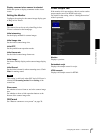
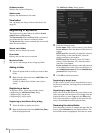
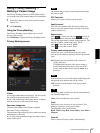
Camera list
You can register cameras in the camera list. By selecting
a registered camera on the viewer screen, you can see the
images from the registered camera.
Note
The camera list can be set only when Plug-in free
Viewer is selected as the homepage.
On/Off
Select On to show the camera list, and Off to hide it.
Style
You can configure the camera list style.
Background color
Specify the background color of the camera list. The
colors are specified in the same way as those for the
header.
Registering in Cameras
Specify a number on the camera list and set the IP
address, port number, and comment for each camera.
Insert: Click to register a camera in the camera list.
Modify: Click to edit a selected camera list.
Delete: Click to delete a selected camera list.
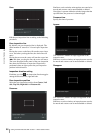
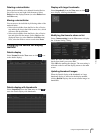
Text
Note
The camera list can be set only when Plug-in free
Viewer is selected as the homepage.
Text1 text, Text2 text and Text3 text
Enter the text to be displayed on the viewer screen.
Text1 link, Text2 link and Text3 link
Specify the URL of the link to assign a link to the text.
Text color, background color 1, and
background color 2
Specify the font color of the text and background colors.
The colors are specified in the same way as specifying
those for the header.