


119
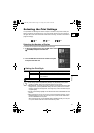
Connecting to a PC
E
Connecting to a PC
Transferring Video Recordings to a
Computer
You can transfer video recordings to the computer using a USB cable or an IEEE1394
(DV) cable. Before transferring video recordings from the tape to the computer, make
sure to prepare the following:
To connect with the USB cable
A computer running Windows XP (Service Pack 1 or Service Pack 2) equipped with a
USB2.0 (Hi-Speed) Terminal
A USB cable (supplied)
Canon USB Video Driver (the driver is included with the supplied DIGITAL VIDEO
SOLUTION DISK)
Windows Movie Maker 2 (Version 2.0.3312.0 with SP1, 2.1.4026.0 with SP2)
To connect with an IEEE1394 (DV) cable
A computer equipped with an IEEE1394 (DV) terminal or an IEEE1394 (DV) capturing
board.
A DV cable (sold separately)
The appropriate driver
A driver is included with Windows operating systems later than Windows 98 Second
Edition and Mac operating systems later than Mac OS 9. The driver is installed
automatically when you connect the camcorder to the computer.
Video editing software
You can use any IEEE1394 compatible video editing software that came bundled with
your computer or video capturing board. You can also use the video editing software
included with your operating system (Windows Movie Maker with Windows XP/
Windows ME; iMovie with Mac OS 9 and later).
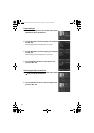
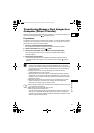
Preparations
1. Start your computer.
If you wish to connect the camcorder using the USB cable, you need to install the
Canon USB Video Driver. For details, refer to the Digital Video Software Instruction
Manual.
2. Set the camcorder to
PLAY(VCR)•
mode.
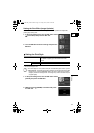
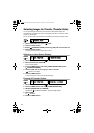
3. When using a USB cable:
Press the MENU button and select [VCR SETUP]. Select [AV DV/ ], set it to
[OFF] and press the MENU button.
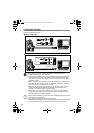
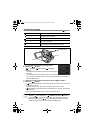
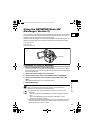
4. Connect the camcorder to the computer using a USB cable or DV
cable.
This completes the preparations and you can start transferring the video recordings.
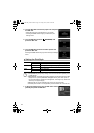
5. Start the software.
Refer to the software instruction manual.
OPTURA 600_NTSC-E.book Page 119 Friday, June 3, 2005 9:27 AM