


36
1
2
3
4
5
6
7
8
9
Cover
PreliminaryNotesand
LegalInformation
Contents:
BasicOperations
AdvancedGuide
CameraBasics
SmartAuto
Mode
OtherShooting
Modes
PMode
Wi-FiFunctions
SettingMenu
Accessories
Appendix
Index
BasicGuide
PlaybackMode
Cover
AdvancedGuide
2
SmartAuto
Mode
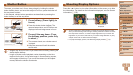
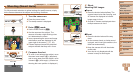
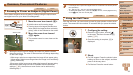
ShootingMovies
Startshooting.
Press the movie button. The camera
beeps once as recording begins, and
[
Rec] is displayed with the elapsed
time.
Black bars displayed on the top and
bottom edges of the screen indicate
image areas not recorded.
Frames displayed around any detected
faces indicate that they are in focus.
Once recording begins, take your nger
off the movie button.
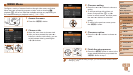
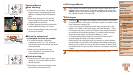
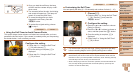
Resizethesubjectand
recomposetheshotasneeded.
To resize the subject, repeat the
operations in step 3 (=
35). However,
note that the sound of camera operations
will be recorded.
When you recompose shots, the
focus, brightness, and colors will be
automatically adjusted.
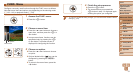
Finishshooting.
Press the movie button again to stop
shooting. The camera beeps twice as
recording stops.
Recording will stop automatically when
the memory card becomes full.
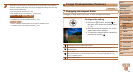
Elapsed Time
StillImages/Movies
•If the camera is turned on while the <p> button is held down, the
camera will no longer sound. To activate sounds again, press the
<n> button and choose [Mute] on the [3] tab, and then press
the <q><r> buttons to choose [Off].
StillImages
•A ashing [ ] icon warns that images are more likely to be blurred
by camera shake. In this case, mount the camera on a tripod or take
other measures to keep it still.
•If your shots are dark despite the ash ring, move closer to the
subject. For details on the ash range, see Flash Range (=
146).
•The subject may be too close if the camera only beeps once when
you press the shutter button halfway. For details on the focusing
range (shooting range), see Shooting Range (=
146).
•To reduce red-eye and to assist in focusing, the lamp may be
activated when shooting in low-light conditions.
•A blinking [h] icon displayed when you attempt to shoot indicates
that shooting is not possible until the ash has nished recharging.
Shooting can resume as soon as the ash is ready, so either press
the shutter button all the way down and wait, or release it and press
it again.
• You can change how long images are displayed after shots (=
47).