


55
1
2
3
4
5
6
7
8
9
Cover
PreliminaryNotesand
LegalInformation
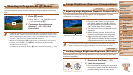
Contents:
BasicOperations
AdvancedGuide
CameraBasics
SmartAuto
Mode
OtherShooting
Modes
PMode
Wi-FiFunctions
SettingMenu
Accessories
Appendix
Index
BasicGuide
PlaybackMode
• To change the number of shots, press the <o><p> buttons after choosing
[
] in step 1. [Blink Detection] (=
45) is only available for the nal shot.
Still Images
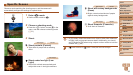
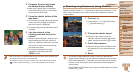
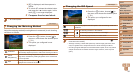
UsingtheWinkSelf-Timer
Aim the camera at a person and press the shutter button all the way down.
The camera will shoot about two seconds after a wink is detected.
1 Choose[ ].
Follow steps 1 – 2 in “Specic Scenes”
(=
49) and choose [ ], and then
press the <p> button.
Press the <q><r> buttons to choose
[
], and then press the <m> button.
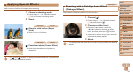
2 Composetheshotandpress
theshutterbuttonhalfway.
Make sure a green frame is displayed
around the face of the person who will
wink.
3 Presstheshutterbuttonallthe
waydown.
The camera now enters shooting standby
mode, and [Wink to take picture] is
displayed.
The lamp blinks and the self-timer sound
is played.
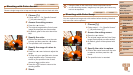
4 Facethecameraandwink.
The camera will shoot about two seconds
after detecting a wink by the person
whose face is inside the frame.
To cancel shooting after you have
triggered the self-timer, press the
<n> button.
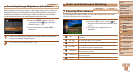
• If the wink is not detected, wink again slowly and deliberately.
• Winking may not be detected if eyes are obscured by hair, a hat, or glasses.
• Closing and opening both eyes at once will also be detected as a wink.
• If winking is not detected, the camera will shoot about 15 seconds later.
• To change the number of shots, press the <o><p> buttons after choosing
[
] in step 1. [Blink Detection] (=
45) is only available for the nal shot.
• If no one is in the shooting area when the shutter button is pressed all the way
down, the camera will shoot after a person enters the shooting area and winks.
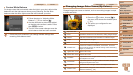
Still Images
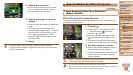
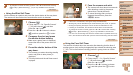
UsingtheFaceSelf-Timer
The camera will shoot about two seconds after detecting that the face of
another person (such as the photographer) has entered the shooting area
(=
65). This is useful when including yourself in group photos or similar
shots.
1 Choose[ ].
Follow steps 1 – 2 in “Specic Scenes”
(=
49) and choose [ ], and then
press the <p> button.
Press the <q><r> buttons to choose
[
], and then press the <m> button.