


76
1
2
3
4
5
6
7
8
9
Cover
PreliminaryNotesand
LegalInformation
Contents:
BasicOperations
AdvancedGuide
CameraBasics
SmartAuto
Mode
OtherShooting
Modes
PMode
Wi-FiFunctions
SettingMenu
Accessories
Appendix
Index
BasicGuide
PlaybackMode
Cover
5
AdvancedGuide
PlaybackMode
Still Images
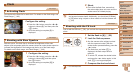
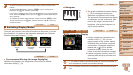
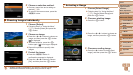
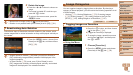
Auto Playback of Similar Images (Smart Shufe)
Based on the current image, the camera offers four images similar to it that you
may wish to view. After you choose to view one of those images, the camera offers
four more images. This is an enjoyable way to play back images in an unexpected
order. Try this feature after you have taken many shots, in many kinds of scenes.
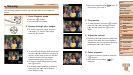
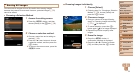
1 ChooseSmartShufe.
Press the <m> button, and then choose
[
] in the menu (=
31).
Four candidate images are displayed.
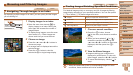
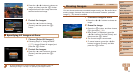
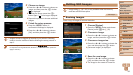
2 Chooseanimage.
Press the <o><p><q><r> buttons to
choose the image you want to view next.
Your chosen image is displayed in the
center, surrounded by the next four
candidate images.
For full-screen display of the center image,
press the <
m
> button. To restore the original
display, press the <
m
> button again.
Press the <n> button to restore
single-image display.
• Only still images shot with this camera are played back using Smart Shufe.
•Smart Shufe is not available in the following cases:
- There are less than 50 shots taken with this camera
- An unsupported image is currently displayed
- Images are shown in ltered display (=
73)
Still Images Movies
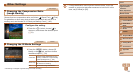
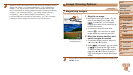
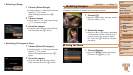
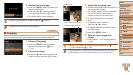
Protecting Images
Protect important images to prevent accidental erasure by the camera
(=
78).
Press the <m> button, and then choose
[:] in the menu (=
31). [Protected]
is displayed.
To cancel protection, repeat this process
and choose [:] again, and then press
the <m> button.
•Protected images on a memory card will be erased if you format the
card (=
113, 114).
• Protected images cannot be erased using the camera’s erasure function. To
erase them this way, rst cancel protection.
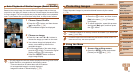
Using the Menu
1 Accessthesettingscreen.
Press the <n> button and choose
[Protect] on the [1] tab (=
32).