52
[Average]
The entire screen is metered by averaging.
A stable exposure can be achieved even in a
capture environment where there are notable
brightness differences within the screen.
Use this mode to stabilize the exposure in locations
where vehicles or people are moving.
[Spot]
The center of the screen is metered.
An appropriate exposure can be achieved for the
subject at the center of the screen regardless of the
brightness/darkness on the periphery of the screen.
Use this mode if you want to adjust the exposure to
the center of the screen because the subject is
receiving a spotlight or backlight, etc.
(4) [Focus Mode]
Set the focus mode when camera starts.
[Auto]
Automatically brings the subject into focus. Normally
[Auto] is selected.
[Fixed at infinity]
The focus can be fixed to near infinity.
(5) [Smart Shade Control]
Select [Disable] or one of the 7 levels from [1 (Mild)] to
[7 (Strong)] for smart shade control at the camera
startup.
(6) [White Balance]
Select the white balance according to the light source
to achieve natural color in the image.
[Auto]
The white balance is adjusted automatically.
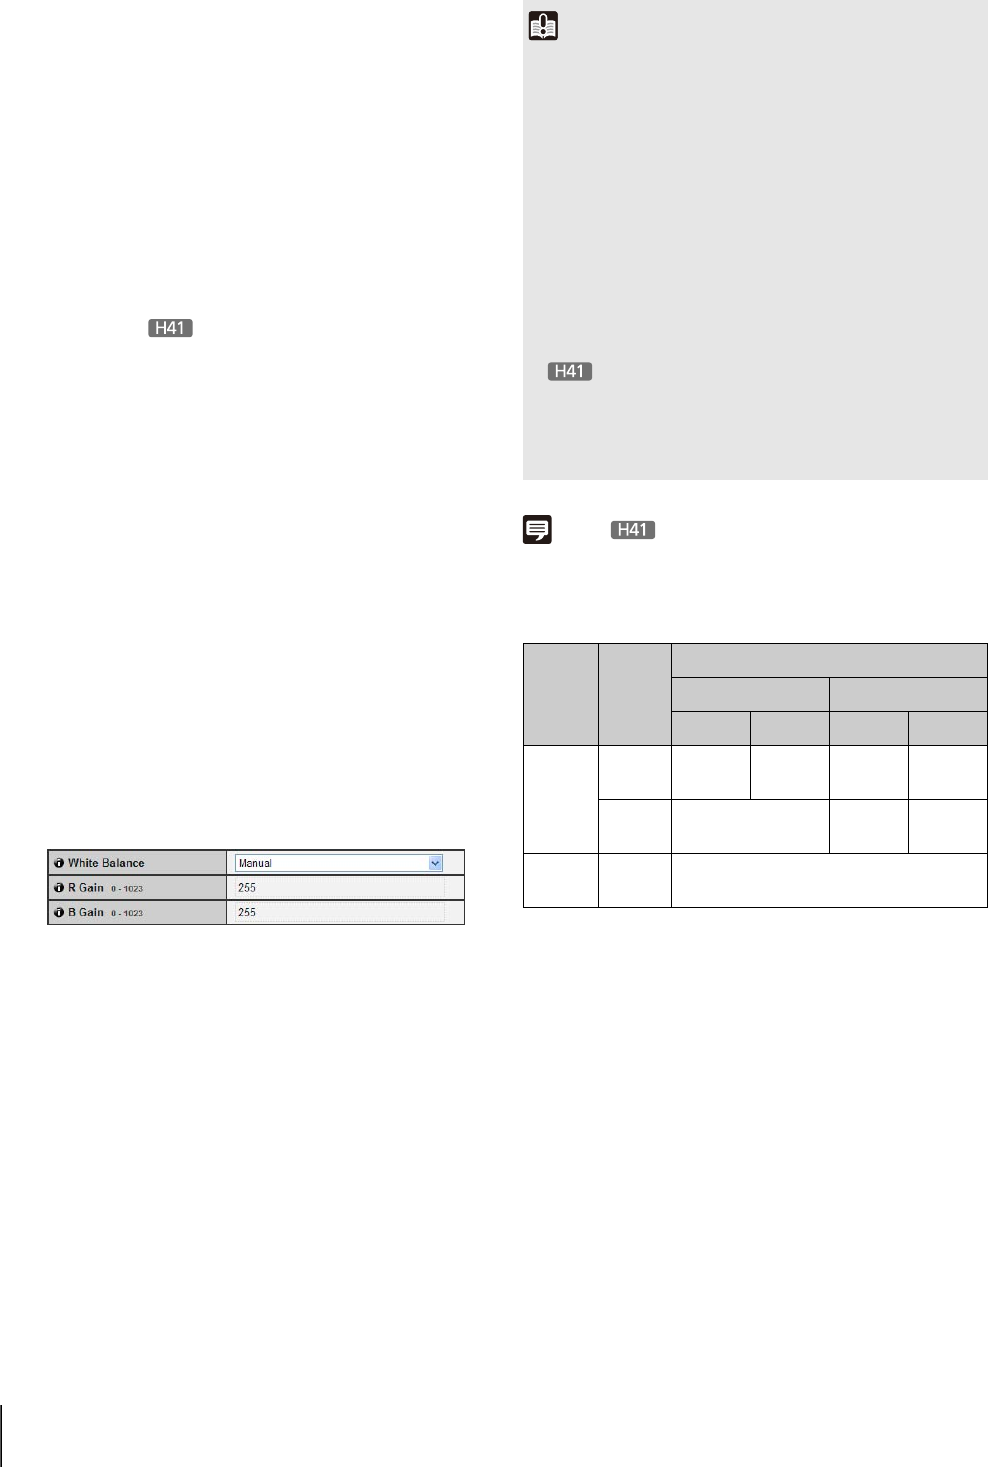
[Manual]
Set the values of red and blue gain according to the
light source. Enter a value from 0 to 1023 for both
the [R Gain] and [B Gain].
[Daylight Fluorescent]
Select this option to capture video under daylight
fluorescent lighting.
[White Fluorescent]
Select this option to capture video under daylight
fluorescent or white fluorescent lighting.
[Warm Fluorescent]
Select this option to capture video under warm
fluorescent lighting.
[Mercury Lamp]
Select this option to capture video under mercury
lamps.
[Sodium Lamp]
Select this option to capture video under orange
sodium lamps.
[Halogen Lamp]
Select this option to capture video under halogen
lamps or incandescent bulbs.
Note
• See “Subjects Difficult to Focus On” (p. 38).
• Focus ranges (rough guide) are shown in the following table
according to the settings of [Day/Night] (p. 53), etc.
* When using an infrared lamp, the camera may be out of focus.
Important
• The initial camera settings (1) to (6) define the defaults that
apply when the camera is started. Setting changes will be
reflected only after the camera is reconnected or rebooted.
Specify the settings used in the actual operating environment
from the Admin Viewer (p. 135).
• If the subject is a traffic signal or electronic scoreboard, etc.,
the captured image may flicker.
In this case, try changing the [AE Mode] setting to [Auto
(Shutter-priority AE)] and selecting a shutter speed lower
than 1/100 to see if the problem improves.
• Setting a slow shutter speed may make it impossible for
intelligent functions to work correctly. Select a shutter speed
that suits the capture conditions and purpose.
•
In conditions where an outdoor scene is captured
from an indoor location through a glass window, the camera
may focus on the glass surface if there is dust or water there.
Install the camera at the shortest possible distance from the
glass surface.
Focus
Mode
Dome
Setting
Day/Night Setting
Day Mode Night Mode
Wide end Tele end Wide end Tele end
Auto
Do not use
0.3 m (12 in)
– infinity
1.0 m (3.3 ft)
– infinity
1.0 m (3.3 ft)
– infinity
1.5 m (4.9 ft)
– infinity
Use 2.0 m (6.6 ft) – infinity
1.0 m (3.3 ft)
– infinity
2.2 m (7.2 ft)
– infinity
Fixed at
infinity
Do not use/
Use
Focused at infinity
*


