Copying 9
English
1. Load A4 plain paper (& page 6).
2. Place your original on the document table
(& “Placing Originals on the Document Table”
on page 8).
3. Make the following settings on the control panel.
If you need to stop copying, press the y Stop/Clear
button.
Note:
If the edges of the copy are cropped off, move the original away
from the corner slightly.
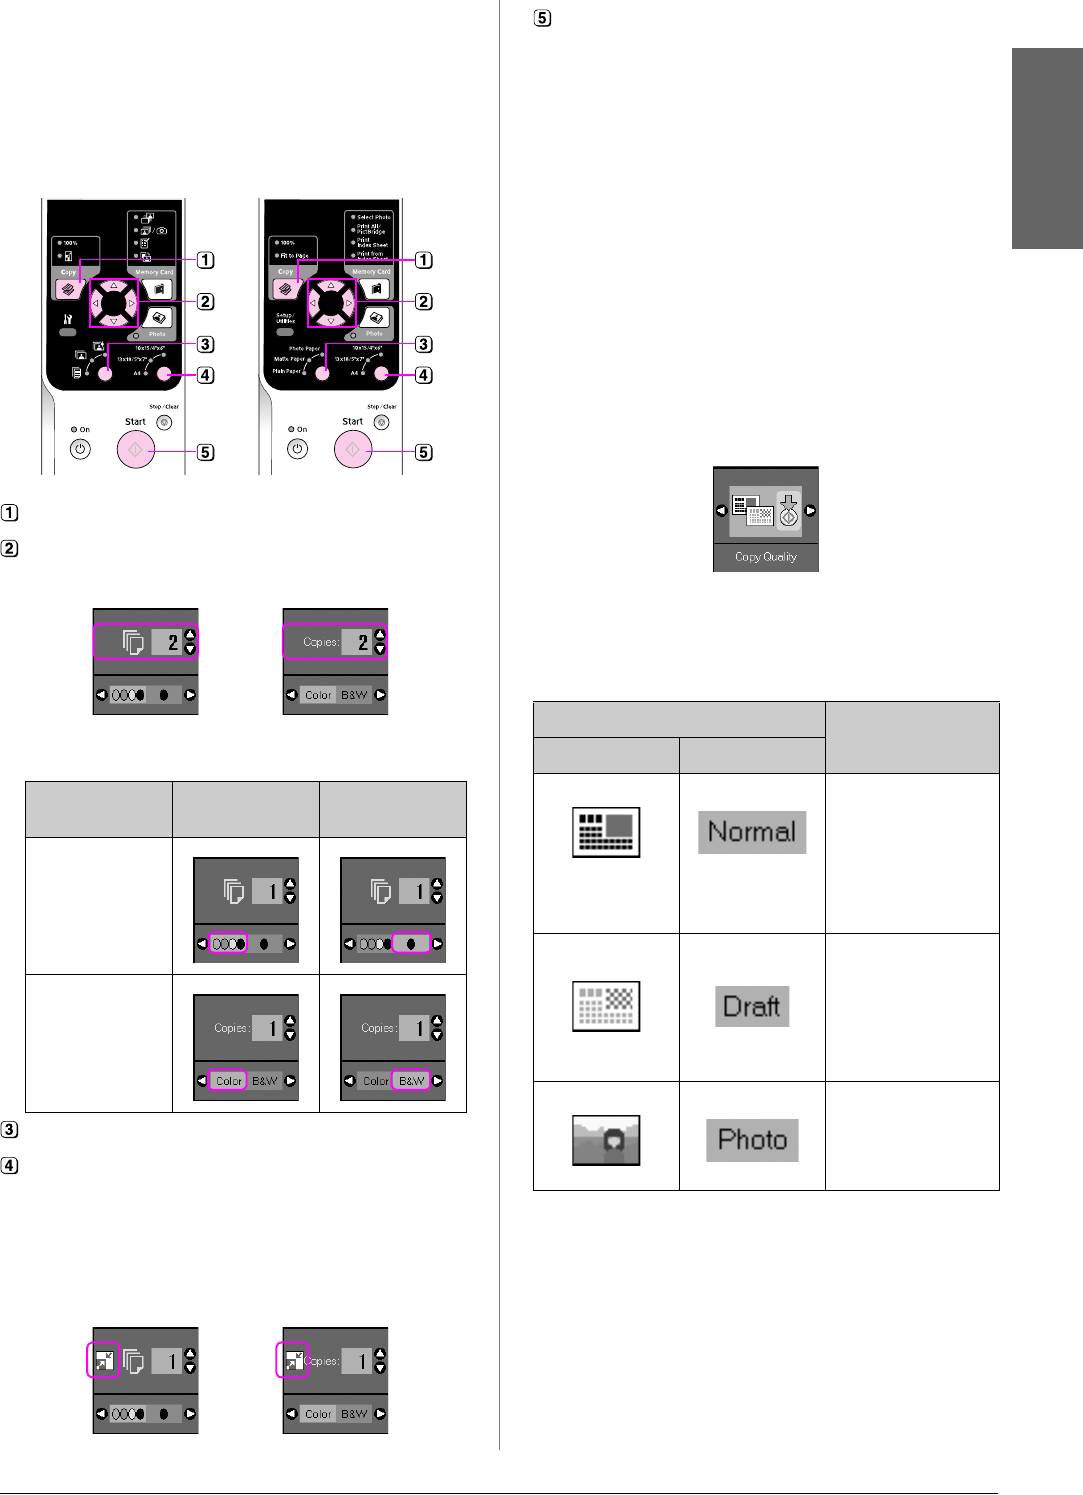
Selecting copy quality
If you want to make a copy quickly and do not need
high quality, you can print a “Draft” copy.
Alternatively, if you want to print high quality
photos, you can print a “Photo” copy.
1. Press the F [Setup/Utilities] button to enter the
setup mode. Use the l or r button to select Copy
Quality.
2. Press the x Start button.
3. Use the u or d button to select Normal, Draft, or
Photo.
4. Press the x Start button again to confirm your
selection.
Press the F [Setup/Utilities] button to return to the
previous mode.
Press the r Copy button.
Use the u or d button to select the number of copies (1 to 99).
Use the l or r button to select color copy or black-and-white
copy.
Display Color Copy Black-and-
White Copy
Icon
Text
Select l [Plain Paper].
Select A4.
Tip:
If you want to automatically resize the copy to the size of
paper that you loaded, press the r Copy button until the icon
shown below is displayed on the LCD screen.
Icon panel Text panel
Icon display Text display
Icon display Text display
Press the x Start button. Your document is copied.
Setting Description
Icon display Text display
Normal:
This is automatically
selected when you
turn the product on.
This mode is the
best for text copy.
Draft:
Select this if you
want to make a
quick copy and
quality is not
important.
Photo:
Select this if you
want to print high
quality photos.


