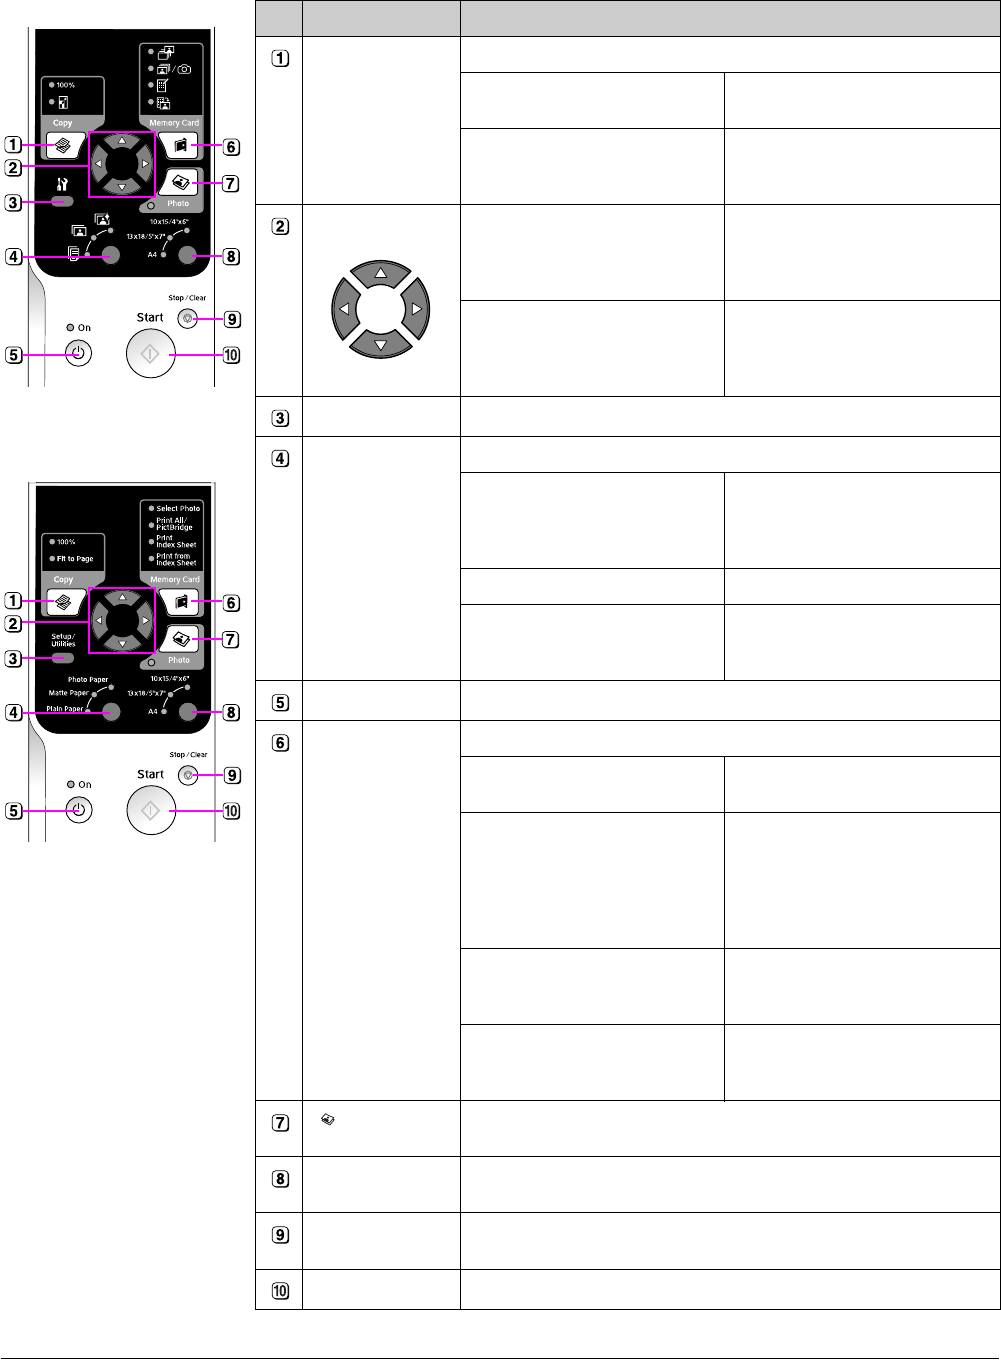
4 Guide to Parts and Control Panel Functions
Control Panel Functions
Buttons
Button Function
r Copy Press to select the copy mode.
100% Select this option to print your
photo at the actual size.
o [Fit to Page] Select this option to reduce or
enlarge the copied photo to fit the
selected paper size.
4-way scroll l r Press to select the photo you want
to print, to select color or
black-and-white copy, or to select
the setup and utility functions.
u d Press to select the number of
copies or to select the numbers
when using the Head Alignment
Utility.
F [Setup/Utilities] Press to run maintenance programs or adjust miscellaneous settings.
Paper Type Press to select the paper type you loaded in the sheet feeder.
g [Photo Paper] Premium Glossy Photo Paper,
Premium Semigloss Photo Paper,
Glossy Photo Paper, Ultra Glossy
Photo Paper
h [Matte Paper] Matte Paper - Heavyweight
l [Plain Paper] Plain paper, Bright White Ink Jet
Paper, Premium Ink Jet Plain
Paper
P On Press to turn the product on and off.
C Memory Card Press to select a memory card print option.
j [Select Photo] Select this option to choose the
photos you want to print.
e / f [Print All / PictBridge] Select this option to print all the
photos on a memory card, to print
photos using the DPOF information
stored on the memory card, or to
print photos directly from a digital
camera.
m [Print Index Sheet] Select this option to print an index
sheet of the photos on your
memory card.
i [Print from Index Sheet] Select this option to print the
photos you selected on the index
sheet.
Photo Press to copy from photos. You can copy them as they are or with color
restoration.
Paper Size Press to select the size of the paper loaded in the sheet feeder. You can
select 10 × 15/4” × 6”, 13 × 18/5” × 7” or A4.
y Stop/Clear Press to stop printing, copying, or reset the settings you have made. The
sheet being printed is ejected and the number of copies is reset.
x Start Press to start printing, copying, or confirm the settings you have selected.
Icon panel
Text panel


