Printing from a Memory Card 17
English
2. Selecting photos from the index
sheet
On the index sheet, use a dark pen or pencil to fill in
the circles and make your selections.
Select All to print one copy of each photo, or fill in the
number beneath each photo to select 1, 2, or 3 copies.
3. Scanning the index sheet and
printing the selected photos
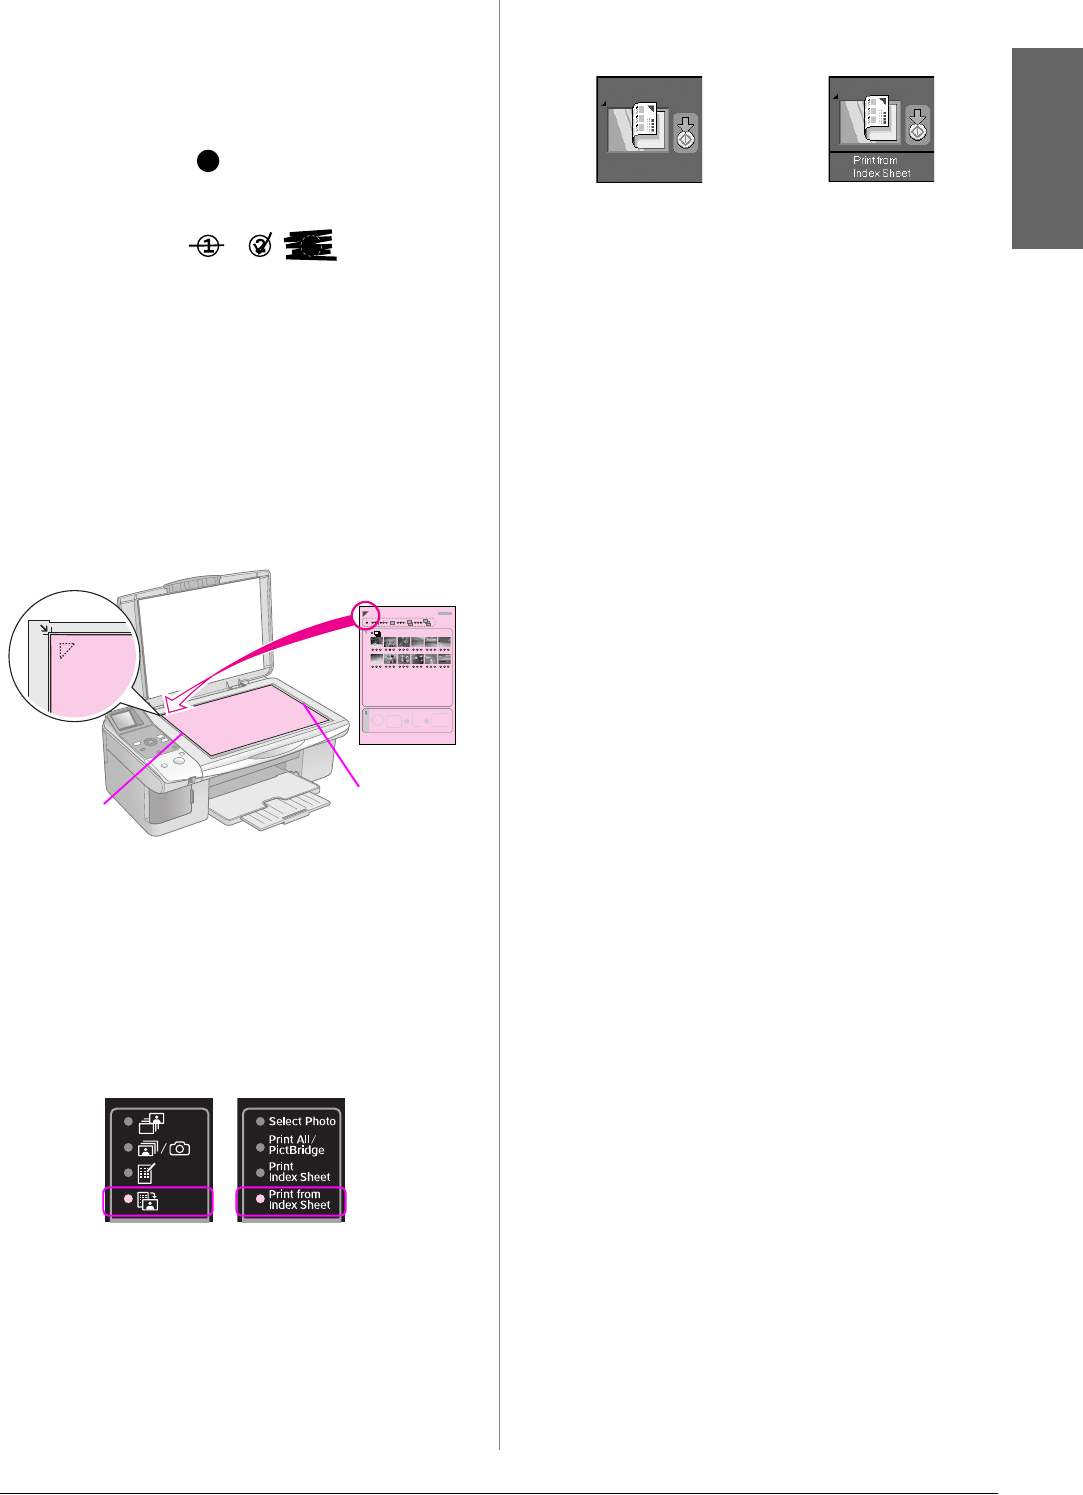
1. Place the index sheet face-down on the
document table, in the upper left corner, so that
the top of the sheet is aligned against the left
edge of the document table.
2. Close the document cover.
3. Load the type of paper you want to use
(& page 6). Load enough sheets for the number
of photos you want to print.
4. Make sure the i [Print from Index Sheet] light
is on.
One of the following screens is displayed.
5. Select the paper type you loaded.
If you select l [Plain Paper], the photos are
printed with a white border. If you select g
[Photo Paper] or h [Matte Paper], the photos
are printed without borders to the edge of the
paper.
6. Select the paper size you loaded.
7. Press the x Start button. Your photos are
printed.
If you want to stop printing, press the y
Stop/Clear button.
Note:
If you have more than one index sheet, wait each time until
printing is complete. Then repeat the steps above to scan and
print from each additional sheet.
Good:
NOT good:
Top
Bottom
Icon panel Text panel
Icon display Text display


