


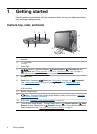
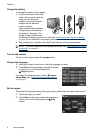

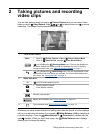

To use the Touch Screen:
• Touch a rounded-corner touch button (as
shown) or menu item on the Touch
Screen. For example, touching
exits
the current screen or menu.
• Whenever you are framing an image or
video clip, you can turn off the Touch
Screen overlay to view the display more
clearly. Press
to turn off the touch
buttons. Press
again to turn on the
touch buttons.
NOTE: Overlay items on the Touch Screen vary based on the task you are
performing.
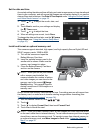
Tips on using the Touch Screen:
• You can use your finger or the stylus (shown above) to make Touch Screen
selections. If you do not want to smudge the Touch Screen, use the stylus (see
“
Caring for the Touch Screen” on page 44).
• For best results, touch the center of the selection.
• If touches have no affect or have unexpected results, try using the stylus. If, after
repeated use, stylus touches have no effect or have unexpected results, you may
need to align the Touch Screen (see “
Aligning the Touch Screen” on page 44).
NOTE: This camera also features a virtual keyboard (via the Touch Screen interface)
which you can use to create image tags and e-mail addresses (see “
Using the
keyboard” on page 28).
Related information
Once you have completed the camera setup tasks (see “Before taking pictures”
on page 5), you can take and review pictures and video clips.
For information on taking pictures and recording
video clips
See “Taking pictures” on page 12 and
“Recording video clips” on page 12.
For information on setting picture capture and
video record options
See “Setting options for taking pictures and
recording video clips” on page 16.
For information on reviewing and tagging
images and video clips on the camera
See “Reviewing images and video clips”
on page 24.
For information on enhancing your images See “Using the Design Gallery Menu”
on page 30.
For information on transferring images from
your camera to a computer
See “Transferring images with HP Photosmart
Software” on page 34.
For information on printing images See “Printing directly to a printer”
on page 36.
For information on setting up and sending
images to online destinations
See “Sharing images” on page 40.
Related information 9