


4. When you are done marking images for which you want to buy prints, touch
repeatedly until you return to Playback.
5. To buy prints of the images you selected, see “
Transferring images with
HP Photosmart Software” on page 34.
Sharing images
You can customize the Share menu to include e-mail addresses, group distribution
lists, or other online services. You can then select images to send to these destinations.
Setting up online destinations in the camera
You can specify up to 100 custom destinations (such as individual e-mail addresses or
group distribution lists) in the
Photosmart Express Menu.
You can create and delete these online destinations using either your camera or the
HP Photosmart Software.
Managing Share destinations using the camera
To manage e-mail addresses using the camera:
1. While in the
Photosmart Express Menu, touch Share, then touch More
Options.
2. In the
Share Options menu:
a. To add an e-mail address, touch Add New Email Address. A keyboard displays.
Enter the e-mail address, then touch Done. For information about using the
keyboard, see “
Using the keyboard” on page 28.
b. To delete an e-mail address, touch Delete an Item from the Menu, touch the
entry you want to delete, then touch Yes.
Repeat this step for each e-mail address you want to add or delete.
3. When you are done, touch
to return to the Share menu.
Managing share destinations using the HP Photosmart Software
When you create share destinations using the HP Photosmart Software, you can include
a label (such as Mom) for the share destination as well as text for the subject line of the
e-mail. The label you specify displays in the
Share menu instead of the e-mail address,
providing an easier way to view and select the share destination you want.
To manage share destinations using the HP Photosmart Software:
1. Verify that your computer is connected to the Internet.
2. Connect the camera to your computer using the
USB cable that came with your camera.
3. When the Transfer Images screen displays, click
Cancel.
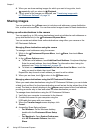
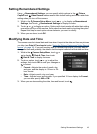
4. Access the Share Setup software.
• For Windows: On the Windows desktop,
double-click the Photosmart Share Setup
icon.
• For Macintosh: Open System Preferences,
click HP Photosmart Camera, then click
Share.
Chapter 7
40 Using HP Photosmart Express