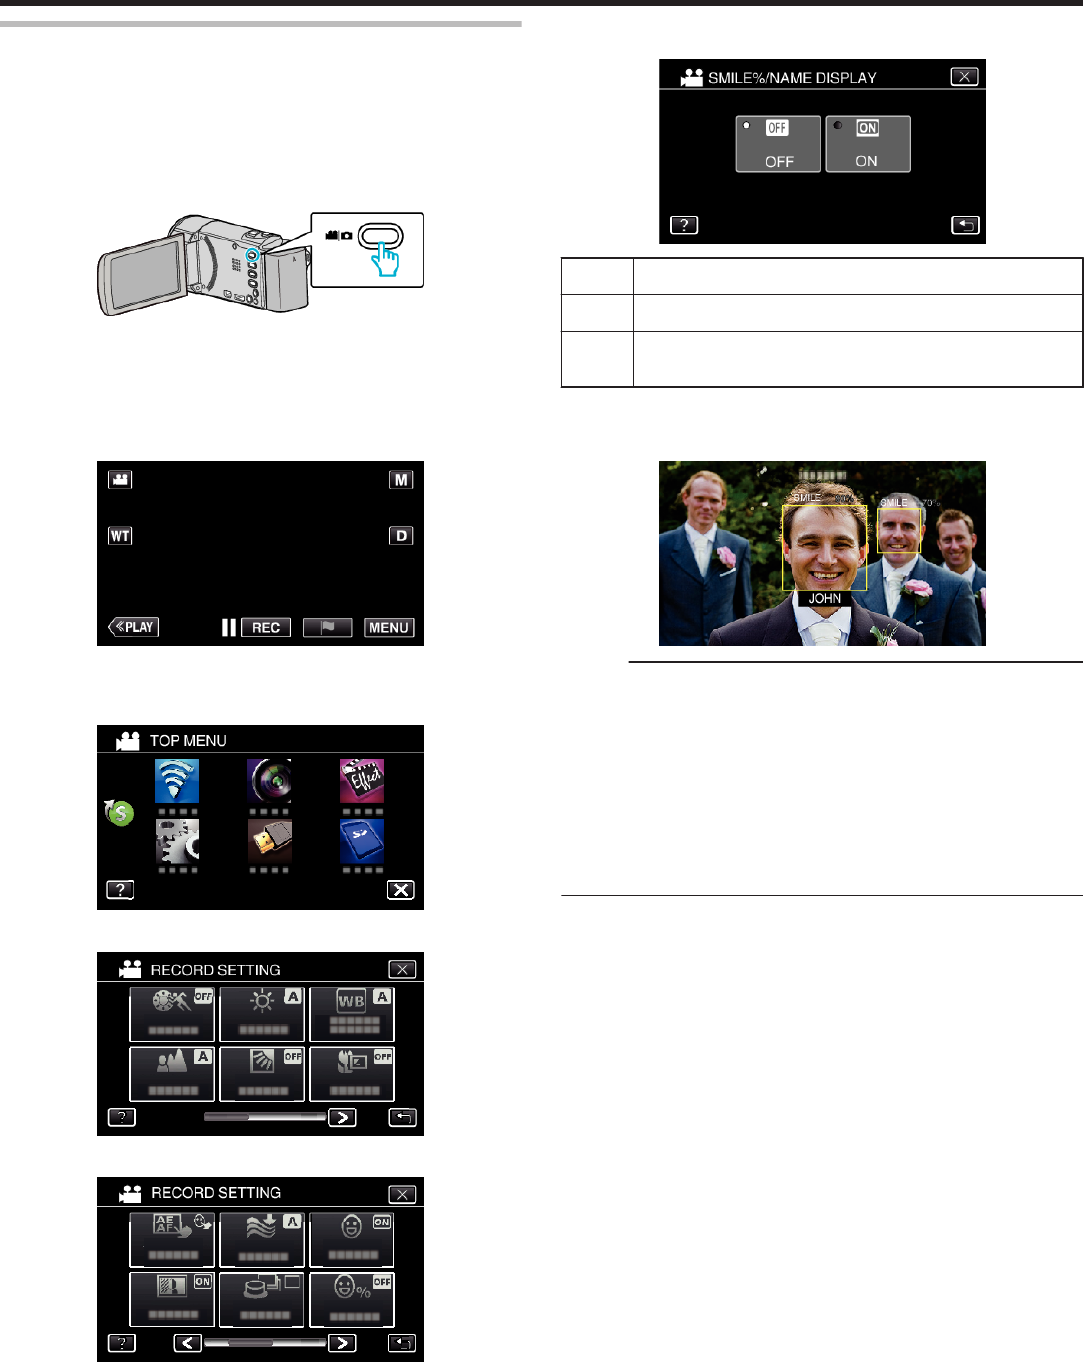
Setting SMILE%/NAME DISPLAY
“SMILE%/NAME DISPLAY” allows you to set the items to display when faces
are detected.
This item is only displayed when “TOUCH PRIORITY AE/AF” is set to “FACE
TRACKING”.
“Capturing Subjects Clearly (TOUCH PRIORITY AE/AF)” (A p. 44)
*The following is a screen of the model with Wi-Fi functions.
1
Open the LCD monitor.
.
0
Set the recording mode to either A video or B still image.
0
To switch the mode between video and still image, tap A or B on the
recording screen to display the mode switching screen.
Tap A or B to switch the mode to video or still image respectively.
(You can also use the A/B button on this unit.)
2
Tap “MENU”.
.
3
Tap “RECORD SETTING”. (Go to step 4.)
Alternatively, tap “SMILE%/NAME DISPLAY” in the shortcut menu. (Go
to step 5.)
.
4
Tap 1 on the lower right of the screen.
.
5
Tap “SMILE%/NAME DISPLAY”.
.
6
Tap the desired setting.
.
Setting Details
OFF Displays only the frames when faces are detected.
ON Displays the frames, names, and smile levels (%) when faces
are detected.
0
Frame: Appears around detected faces.
Name: Appears for faces that are registered.
Smile level: Appears in value (0 % - 100 %) for detected smiles.
.
Memo :
0
The camera is able to detect up to 16 faces. Smile levels will be displayed
for up to 3 of the largest faces displayed on the screen.
0
Some faces may not be detected depending on the shooting environment.
0
You can register personal authentication information like face, name, and
priority level of person before recording.
0
Up to 3 registered names will be displayed according to the priority level.
“Registering Human Face Personal Authentication Information” (A p. 48)
0
“SMILE%/NAME DISPLAY” is set to “ON” when the demo mode is
activated.
“ DEMO MODE ” (A p. 239)
Recording
50


