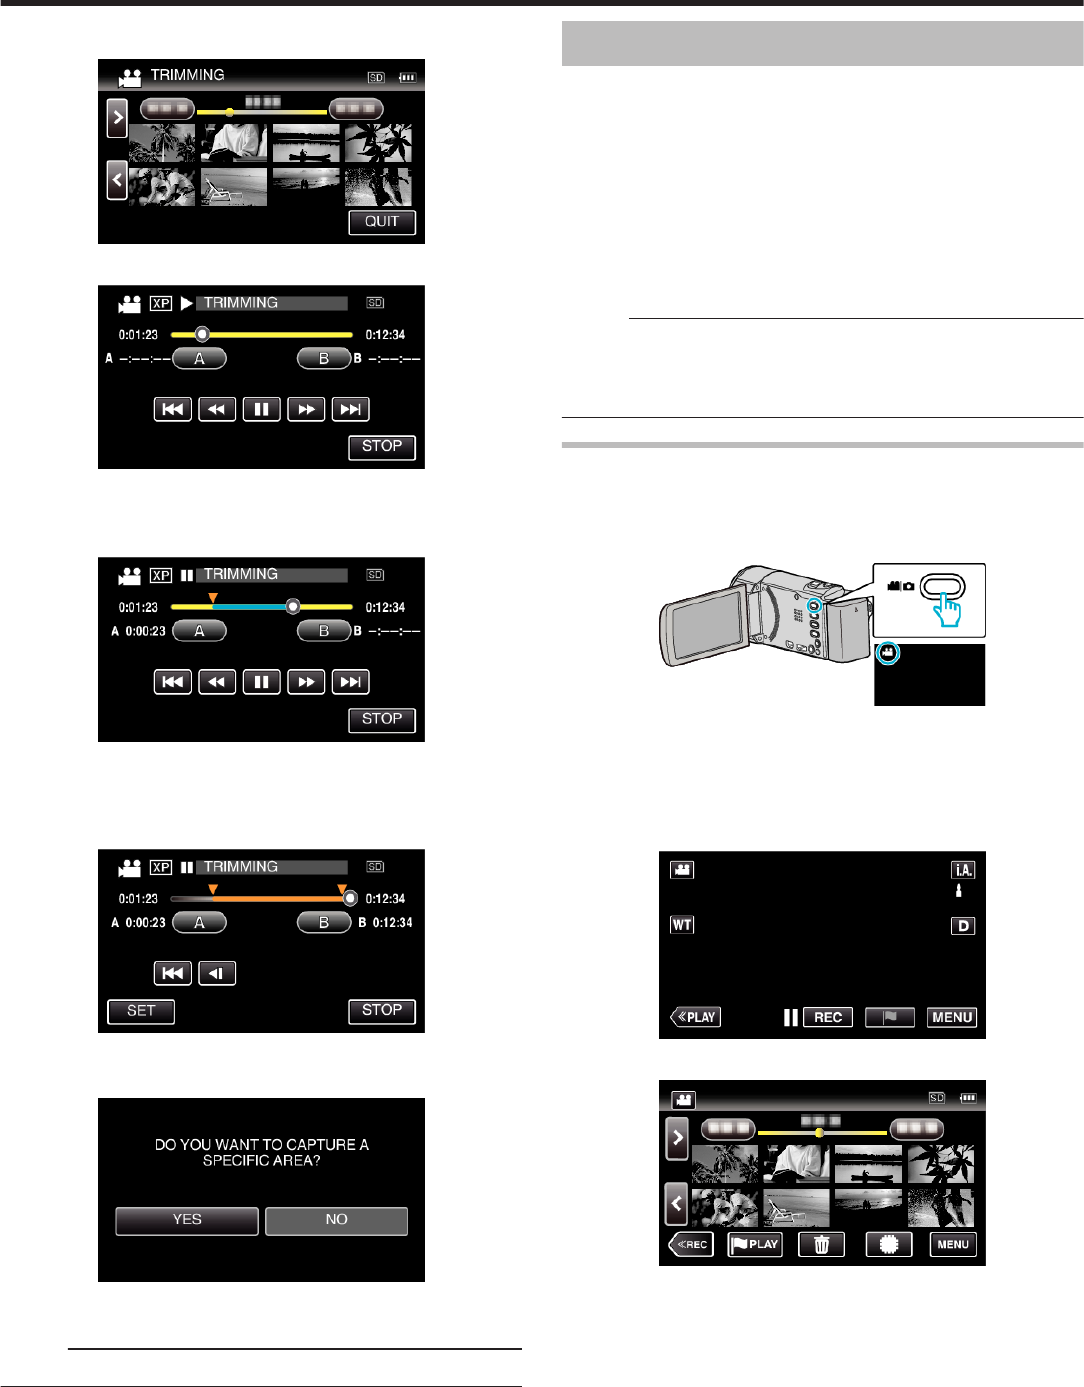
6
Tap the video to edit.
.
7
Tap e to pause playback at the desired start point, then tap “A”.
.
0
When “A” is tapped, the start point is set.
0
After setting the start point, tap d to continue playback.
8
Tap e to pause playback at the desired end point, then tap “B”.
.
0
When “B” is tapped, the end point is set.
0
To reset the start or end point, tap “A” or “B” at the desired scene
(position).
9
Tap “SET”.
.
0
When “SET” is tapped, the trimming area is confirmed.
10
Tap “YES”.
.
0
After copying, tap “OK”.
0
When copying finishes, the copied file is added to the index screen.
Memo :
0
The division point may deviate slightly from the selected scene.
Creating Playlists from the Recorded Videos
A list created by selecting your favorite videos from the recorded ones is
called a playlist.
By creating a playlist, you can play back only your favorite videos in the order
you like.
The original video file remains even when it is registered to a playlist.
0
To create a new playlist
“Creating Playlists with Selected Files” (A p. 85)
“Creating Playlists by Date” (A p. 87)
0
To edit or delete a created playlist
“Editing Playlists” (A p. 88)
“Deleting Playlists” (A p. 89)
Memo :
0
When a video file is deleted or moved, the same file will be removed from
the playlist.
0
Videos recorded in the iFrame format can not be selected when creating
a playlist.
Creating Playlists with Selected Files
Create a playlist by arranging the files one by one.
0
The following is a screen of the model with the built-in memory.
1
Open the LCD monitor.
.
0
Check if the recording mode is A.
0
If the mode is B still image, tap B on the recording screen to display
the mode switching screen.
Tap A to switch the mode to video. (You can also use the A/B button
on this unit.)
2
Tap “<<PLAY” to select the playback mode.
.
3
Tap “MENU”.
.
Editing
85
