16
Installation
3
Installation
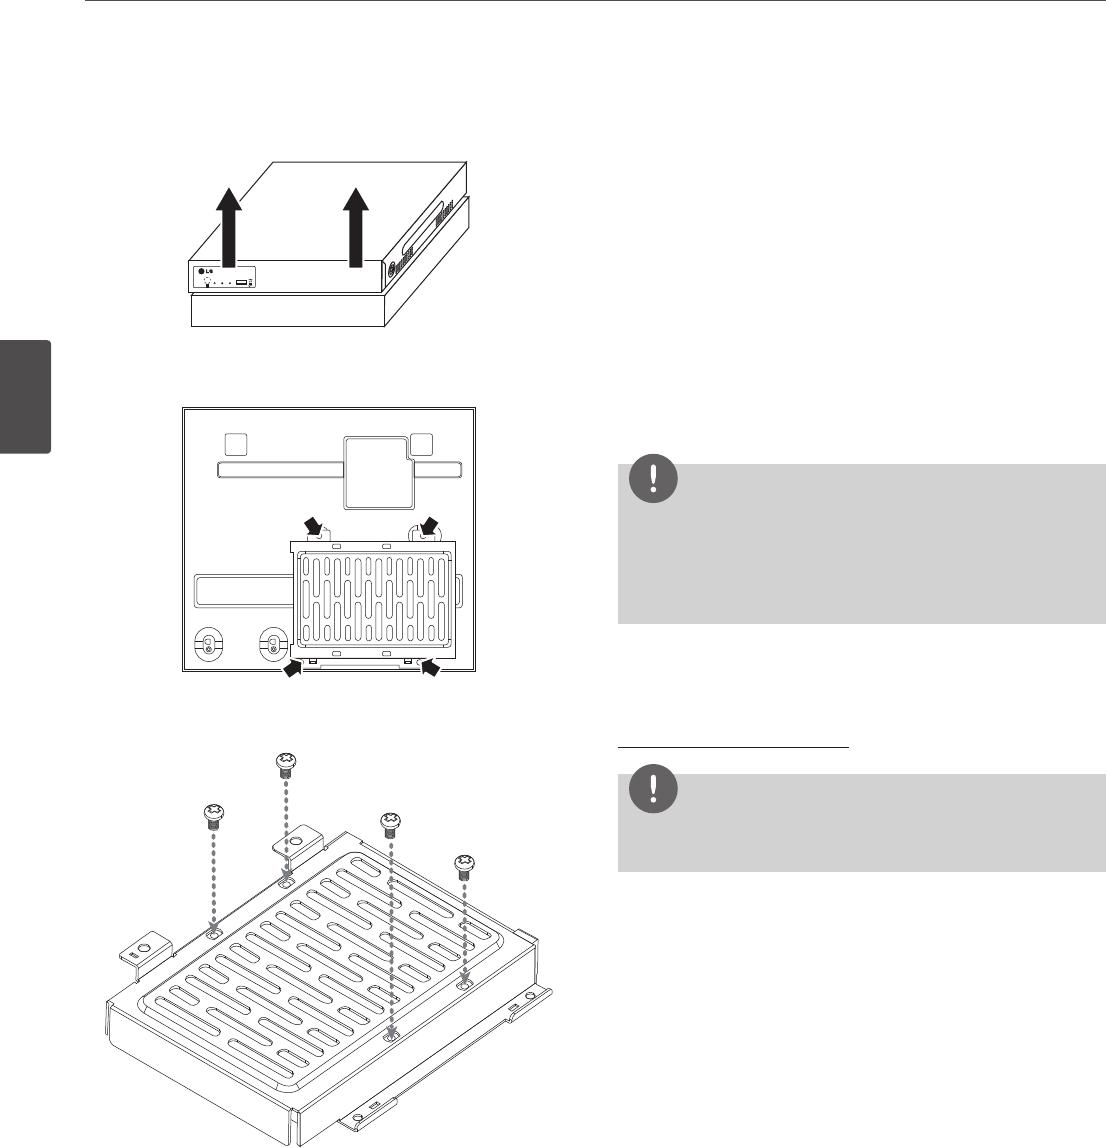
2. Detach the top case by sliding it after removing the screws. You
must lift up the top case verticality.
POWER
HDD LAN
H.264 Network Video Recorder
3. Remove the screws and detach the hard disk mounting brackets
from the unit.
4. Attach the HDD onto the hard disk mounting brackets with four
screws.
5. Attach the hard disk mounting brackets with the screws.
6. Connect the HDD power cable. You must use the supplied SATA
power cable. The SATA power cable that used for normal PC is
not compatible with this unit.
7. Connect the Serial SATA cable.
8. Connect the SATA cable of the HDD to the SATA connector of
the main board.
9. Assemble the top case.
10. Fix the screws.
11. When you turn the power of the unit on, the new HDD is
detected and formatted automatically.
Replacing the Hard Disk Drive
Turn the power of the unit off and detach the power plug from the
outlet.
1. Follow steps 1 to 3 described in “Installing the Hard Disk Drive”.
2. Remove the connector from the HDD.
3. Remove the screws from the hard disk drive on the bottom of
the hard disk mounting bracket.
4. Replace the new HDD.
5. Follow steps 4 to 10 described in “Installing the Hard Disk Drive”.
6. After replacing the hard disk drive, insert the power plug into
the outlet and turn the power of the unit on. The new HDD is
detected and formatted.
automatically.
NOTE
• Do not use an electric screwdriver to fix them.
• Make sure that each of the SATA cables is connected to the
connector housing through its holes.
• Do not stack them nor keep them upright.
Recommended HDD
For the latest recommended HDD list, please visit
http://www.lgecommercial.com
NOTE
If you do not use the recommended HDD, the system may not be
operated normally.


