26
Installation
3
Installation
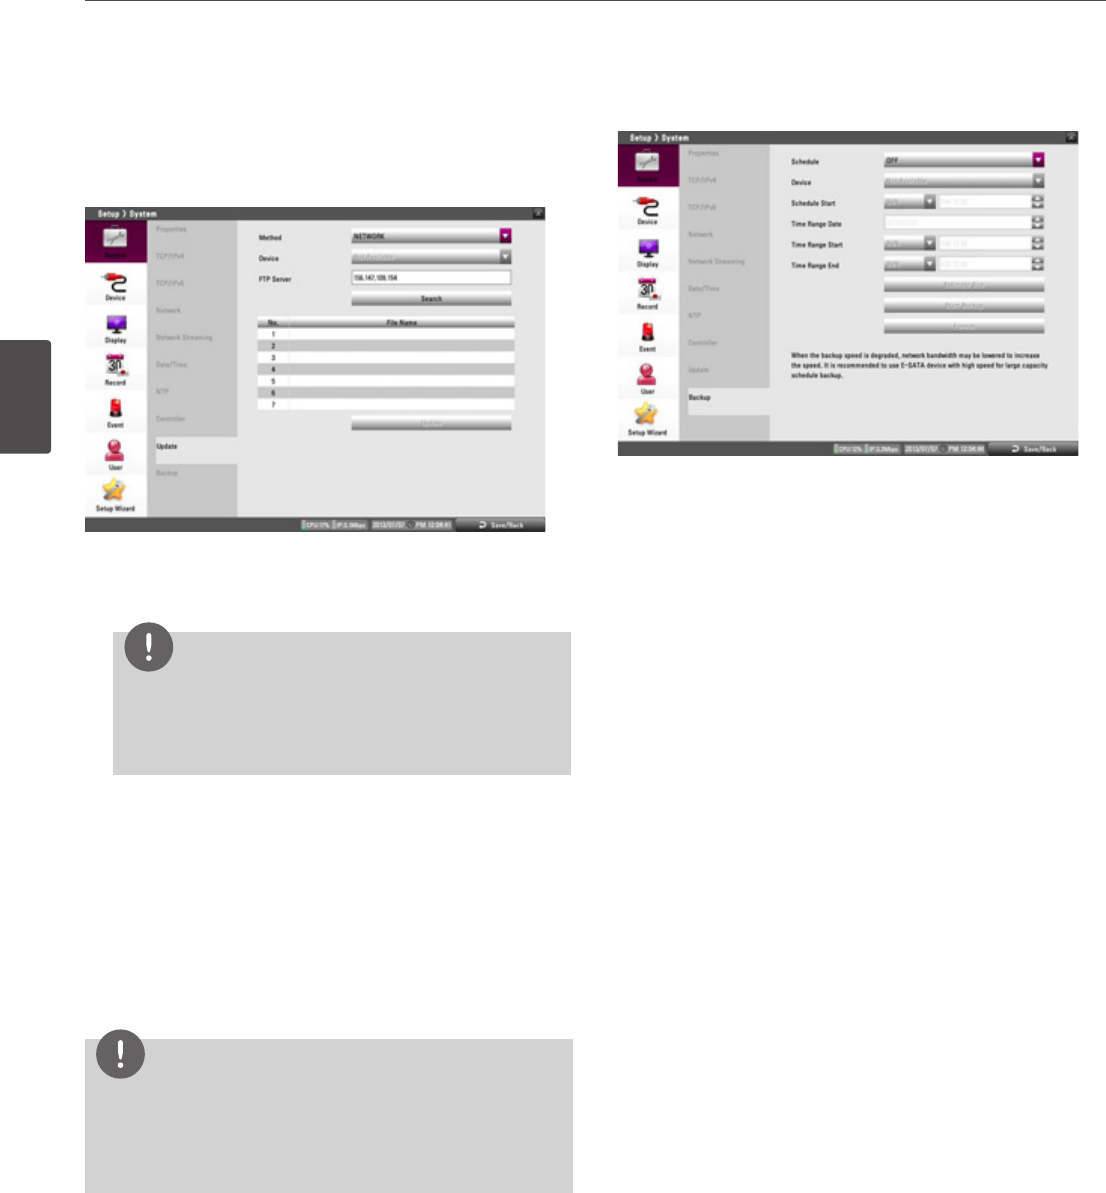
Update
This function is aimed at upgrade the system software. In this case,
the current system settings are not deleted or replaced during the
update process.
1. Selects the update method.
2. Selects the device included update file or enter the FTP server
name.
NOTE
If you select the update method to [LOCAL], the [FTP Server]
option will be disabled and the [Device] option is activated.
And if you select update method to [NETWORK], the [Device]
option will be disabled and [FTP Server] option is activated.
3. Select the [Search] button and press OK. The update file is
displayed in the list.
4. Choose the update file from the list.
5. Select the [Update] button and press OK. The confirmation
window is displayed.
6. Select [OK] to begin the update process or click [Cancel] to stop
and exit. After the update process is completed, the [Restart the
system] message appears.
7. Click [OK] to restart the system.
NOTE
• Do not turn the power off during the update process to
prevent the malfunction.
• Do not remove the external device for update while the
update is in progress. It may cause a malfunction.
Backup
• Schedule: You can set the backup schedule.
- OFF: All options are disabled.
- WEEKLY or DAILY: The backup data will be automatically
saved according to the setting.
- INSTANT: The backup data is saved manually.
• Device: Select a backup device.
• Schedule Start: Set the schedule start date (A day of the week
and time).
• Time Range Date: Enter the backup time range. Enter the date
you want to backup.
• Time Range Start: Enter the start day of the week or time.
• Time Range End: Enter the end day of the week or time.
• Estimate Size: Displays the size of backup data and the free
space of external devices.
• Start Backup: To start backup.
• Erase Media: To erase the media.
Instant Backup
1. Connect the USB device for backup.
2. Select the partition you want to backup.
3. Select INSTANT from the schedule options.
4. Select the backup device.
5. Select the Time Range Date, Time Range Start time, and Time
Range End time for backup.
6. Select the [Estimate Size] icon and press OK.
7. Check the size of the selected data and free space. If the device
does not have enough space, create space on the device or
erase the previously stored data.
8. Select the [Start Backup] icon and press OK to start backup.
9. Exit the setup menu. You can check the backup status on the
system control bar in backup progress.
