


28
Installation
3
Installation
Device settings
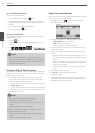
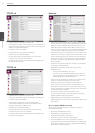
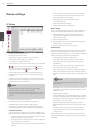
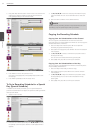
IP Device
• CH: Displays the channel number.
• Name: Enter the channel name.
• Model Name: Displays the model name of IP device.
• MAC: Displays the Mac address of IP device.
• IP: Displays the IP address of IP device.
• HTTP Port: Enter the HTTP port number. HTTPS is not supported.
• / : You can see other options (Driver, Profile1, Profile2,
RTSP Port, RTP Mode, Audio Recording) to click button. To
return previous options, click button.
• Driver: Selects the IP camera driver from the drop-down list.
• Profile1: Select the camera stream on the drop-down box for
recording.
• Profile2: Select the camera stream on the drop-down box for
streaming. For smooth live playback, the resolution of [Profile2]
set lower than resolution of [Profile1].
NOTE
• When you select full screen mode on the [split mode],
[Profile1] operate for streaming automatically.
• When CPU usage occupies more than 90% and then 1 minute
goes by, connection of [Profile2] is limited for the stability of
system.
• RTSP Port: Enter the RTSP port number.
• RTP Mode: Select the RTP mode from drop-down list.
• Audio Recording: Check the audio recording option.
• Setup: Click the check box of the desired channel and then
press the [Setup] button. The setup window will be displayed.
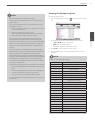
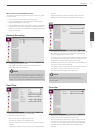
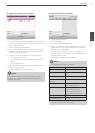
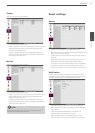
Audio/Sensor setting
You can configure this option when you select to [LGE] on the
[Driver] option. Select [Audio/Sensor] tab of the [Setup] window.
- Audio In: Click the check box if you want to send the audio
from the microphone input connector.
- Audio Type: Select the codec when you send the audio from
the microphone input connector.
- Audio Out: Click the check box to output the audio from the
speaker.
- Sensor: Select the sensor number on the drop-down list.
- In Use: Marks up when you want to activate the sensor.
- Sensor Type: Select the sensor type.
- Relay Output: Select the relay output number
on the drop-down list.
- Relay Type: Select the relay type.
- Control Duration: Enter the relay time.
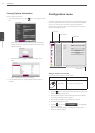
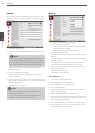
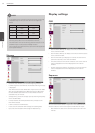
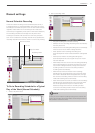
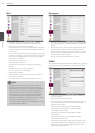
Motion Setting
You can configure this option when you select to [LGE] on the
[Driver] option. Select [Motion] tab of the [Setup] window.
1. Click the [Add] button. The motion detect window is
displayed. You can add the five windows maximum for
motion detection area.
2. Set the [Sensitivity] option.
3. Click the edge or corner of the window box to adjust the
window size for motion detection.
4. Click the [Save] button to save the settings.
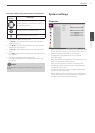
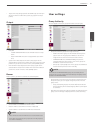
Stream Setting
If you select to [LGE] on the [Driver] option, select the [Stream]
tab. When you select [ONVIF] on the [Driver] option, you can
configure the stream setting only. In case of [AXIS], the [Bitrate]
and the [Compression] options are activated only.
- Stream (LGE only): Select the video stream.
- In Use (LGE only): Click to activate the stream function.
- Video Codec: Select the video mode (Codec) from the
dropdown list.
- Resolution: Select the output image size of the camera.
- Frame Rate: Set the frame rate of the image.
- GOP: It means “Group of Pictures”. The higher the GOP, the
better is the video quality of the camera. Edit the value of
GOP from 1 to 30. This setting is valid for H.264 video format
only.
NOTE
It recommended that you set the [GOP] value same as
[Frame Rate].
- GOV (ONVIF only): It means “Group of VOPs”. The VOP is an
image frame in the MPEG-4 video stream. Edit the value of
GOV from 1 to 30.
- Quality: Select the Quality.
- Stream Quality (LGE only): If the [Quality] option set to VBR,
this option is displayed. Select the stream quality from the
drop down box, the camera supports five types. (Highest,
High, Medium, Low and Lowest)
- Bitrate: If the [Quality] option set to CBR, this option is
displayed. Edit the bit rate value from 256 kbps to 10 240
kbps.
- Compession (AXIS only): Enter the compression ratio of
video. The lower value you set up, the higher definition
picture you get.
• Delete: Click the check box of the desired channel and then
press the [Delete] button. Registered channel of IP Camera will
be deleted.