


16
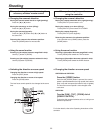
How to turn the power on and off
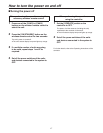
Turning the power on
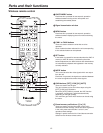
When performing the operations using the
accessory wireless remote control
1 Set all the power switches of the units
and devices connected in the system to
ON.
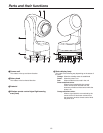
This unit does not have a power switch.
When power is supplied to it, the status display lamp
will light up orange.
2 Press one of the [CAM1] to [CAM4]
buttons on the wireless remote control to
select the unit.
3 Press the [ON/STANDBY] button on the
wireless remote control for two seconds.
The power of the unit is turned on, and the initial
settings operation is performed.
The unit’s status display lamp now lights up green.
4 If a multiple number of units are going
to be used, repeat steps
2 and 3 as
required.
The unit’s status display lamp blinks green when a signal
matched by the remote control ID has been received, and
it blinks orange when a signal that is not matched by the
remote control ID has been received.
When performing the operations
using the controller
1 Set all the power switches of the units
and devices connected in the system to
ON.
This unit does not have a power switch.
When power is supplied to it, the status display lamp
will light up orange.
2 Set the [OPERATE] switch on the
controller to ON.
The power of all the cameras connected to the
controller (including the unit) is turned on, and initial
setup is performed.
The unit’s status display lamp now lights up green.
It takes about 30 seconds per unit for the initial settings
operation to be completed. During this period, the unit
cannot be operated.
Before setting the [OPERATE] switch on the controller to
ON, be absolutely sure to set all the power switches of the
units and devices connected in the system to ON.
For further details, refer to the Operating Instructions of the
controller.