20
How to select the shooting mode
When performing the operations using the
accessory wireless remote control
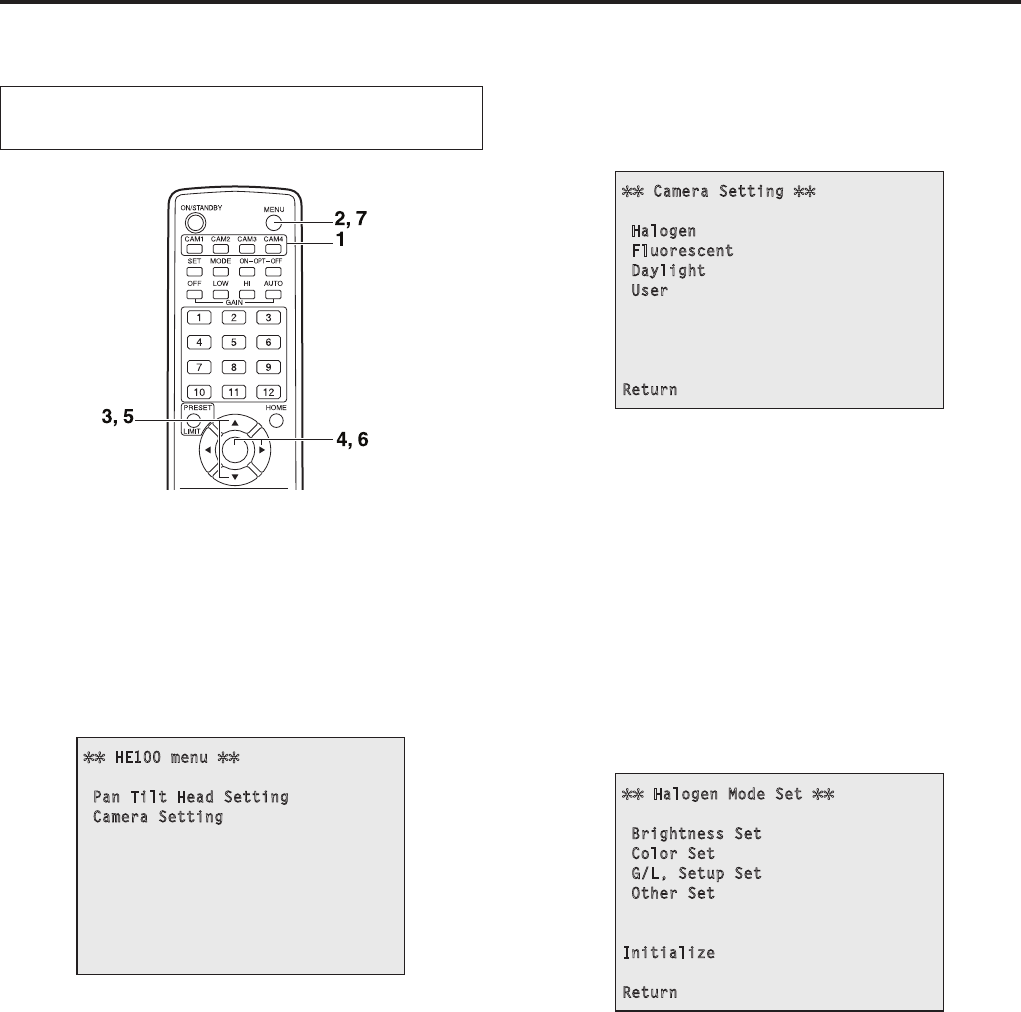
1 Press the [CAM1], [CAM2], [CAM3] or
[CAM4] button to select the unit.
2 Press the [MENU] button for two
seconds.
The main menu is displayed.
HE100 menu
Pan Tilt Head Setting
Camera Setting
3 Press the [] or [] button to make
“Camera Setting” blink.
Each time the [] or [] button is pressed, the blinking
item changes.
4 Press the [] or [] button.
The “Camera Setting” sub-menu is displayed.
Camera Setting
Halogen
Fluorescent
Daylight
User
Return
5 Press the [] or [] button to make the
shooting mode to be used blink.
Each time the [] or [] button is pressed, the blinking
item changes.
When
“Return” is made to blink and the [] or []
button is pressed, operation returns to the previous
menu.
6 Press the [] or [] button.
The unit is now set to the shooting mode that is
blinking, and a sub-menu is displayed.
Halogen Mode Set
Brightness Set
Color Set
G/L, Setup Set
Other Set
Initialize
Return
Example: Halogen mode
7 Press the [MENU] button for two
seconds.
The menu display is exited.
Selecting the shooting modes (scene files)


