


39
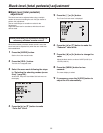
3 Press the [] or [] button to make “G/L,
Setup Set” blink.
4 Press the [] or [] button.
The “G/L, Setup Set” sub-menu is displayed.
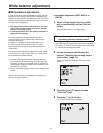
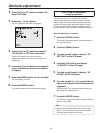
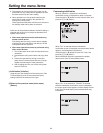
G/L, Setup Set
H Phase +1
SC Coarse 180deg
SC Fine ±0
Setup Level On
Return
5 Press the [] or [] button to make the
“SC Coarse” or “SC Fine” value blink.
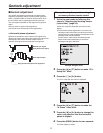
Use the “SC Coarse” item to perform coarse
adjustments, and the “SC Fine” item to perform fine
adjustments.
6 Press the [] or [] button to change the
value, and adjust so that the color phase
is aligned.
7 Press the [MENU] button for two seconds.
The menu display is exited.
8 Press the [MODE] button.
The mode is switched to the camera picture display.
When doing the adjustment
using the controller
The same operations as in steps 2 to 7 of “When
performing the operations using the accessory wireless
remote control” can be performed following the operation
procedure for
“Basic menu operations” (pages 40 to 42).
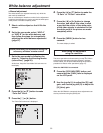
To switch between “BAR” (color bar display) and “CAM”
(camera pictures), press the [MODE] or [BAR/CAM] button.
When the AW-RP655 is connected:
1 Press the [MODE] button.
The button’s lamp lights, and the mode is switched to
the color bar display.
2 Press the [MENU] button.
3 Turn the jog dial (main) to display “G/L
SETTING” on the LCD panel.
4 Press the [OK] button, and display
“H PHASE” on the LCD panel.
5 Turn the jog dial (main) to display “SC
PHASE” on the LCD panel.
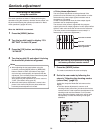
6 Turn the jog dial (L) or the jog dial (R) and
adjust it to bring the horizontal phase into
alignment.
Use the jog dial (L) to adjust the phase coarsely and
the jog dial (R) to adjust it finely.
7 Press the [MODE] button.
The button’s lamp goes off, and the display is switched
to the camera picture.
When hor
izontal phase adjustment is moved, color
phase is also moved. Adjust color phase whenever
horizontal phase adjustment is moved.
Note
Genlock adjustment