Administrating the Camera
Setting the Camera Image and Audio — Camera Menu
45
Click Schedule to display the setting menu for the
effective period. (“Setting the Schedule — Schedule
Menu” on page 90)
Sensor input: Controls the day/night mode by
synchronizing it with the sensor input.
While a sensor input is detected, the camera works in
night mode.
Easy Focus
When Sync with Day/Night is selected, Easy Focus will
be activated once Day/Night mode switched, and the
focus readjusted automatically.
For details on Easy Focus, refer to the “Focus tab —
Adjusting the Focus (SNC-CH240/CH140 only)”
(page 40) and “Focus/Zoom tab — Adjusting the focus/
zoom (SNC-CH180/CH280/DH140/DH180/DH240/
DH280 only)” (page 41).
Notes
• When using Easy Focus, satisfactory focus may not be
achieved.
• When using Easy Focus, the alarm of motion detection
is deactivated.
• When using Day/Night link, confirm the focus
condition under both Day and Night mode.
View-DR
When “Turn off in Night mode” is checked View-DR
setting is turned off automatically in night mode. For
details about View-DR, see “Picture Tab” on page 41.
IR illuminator (SNC-CH180/DH180/CH280/
DH280)
Sync with Day/Night: IR illuminator will be activated
once Day/Night mode switched, when it is checked.
off: IR illuminator will be always off.
Maximum Strength: From low to high, Maximum
strength for IR illuminator is graded from level1 to
level6.
OK/Cancel
See “Buttons common to every menu” on page 32.
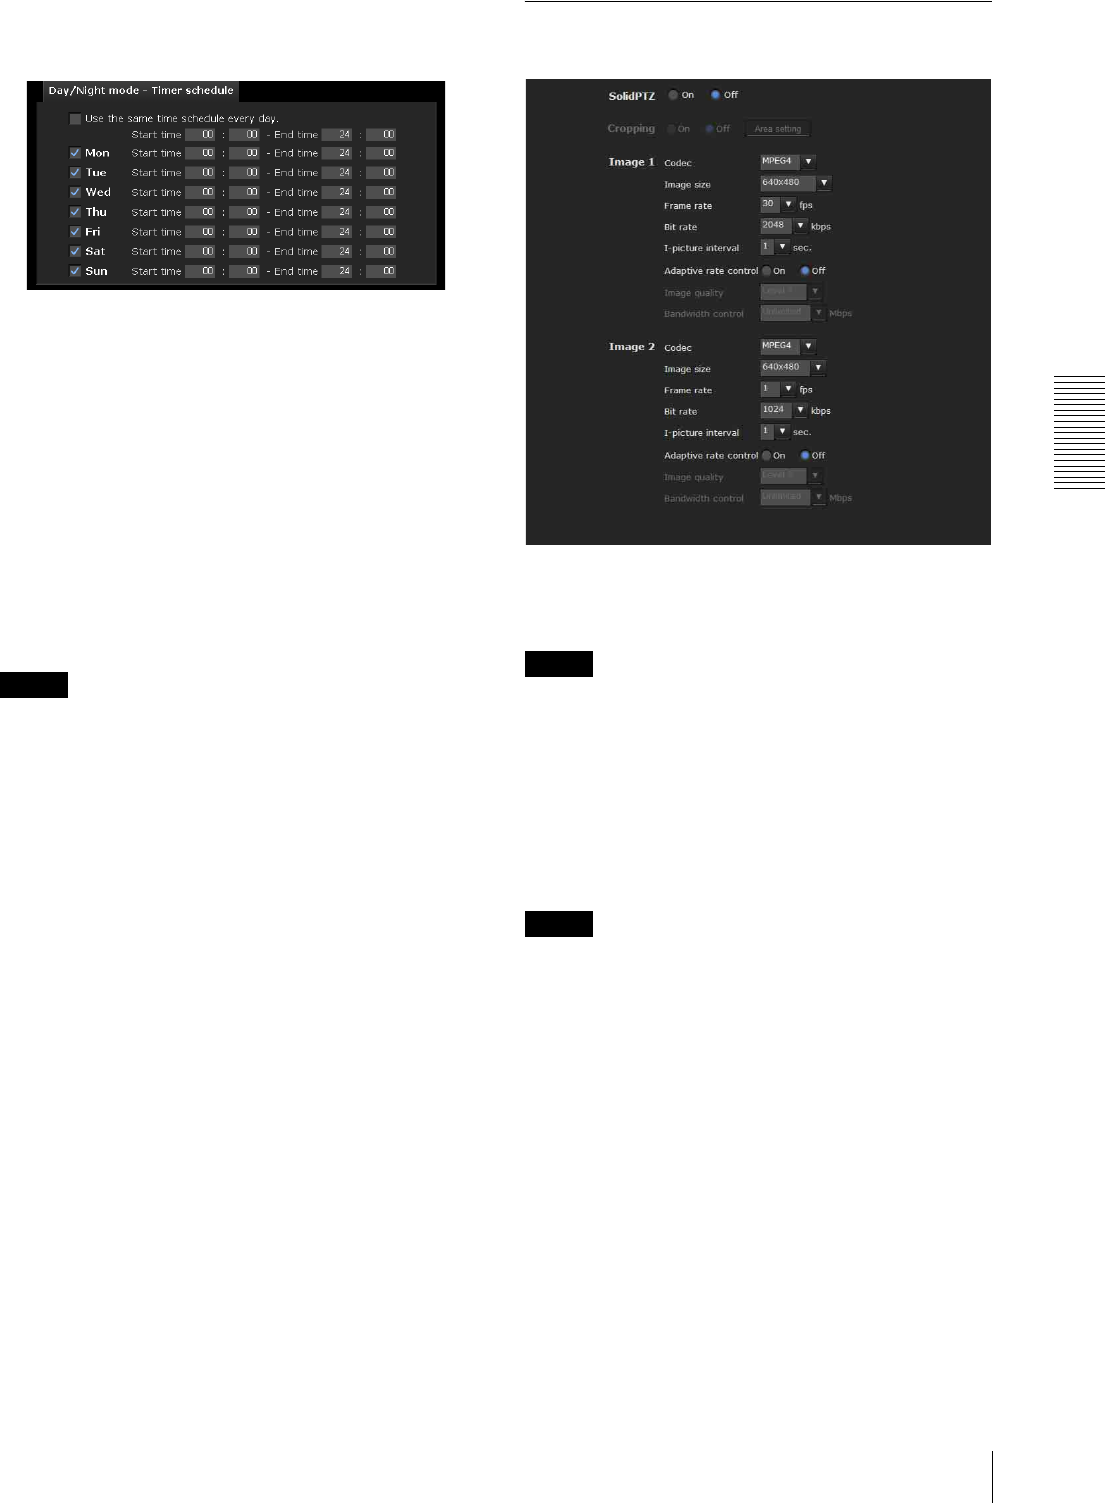
Video codec Tab
Use this tab to set the items for the video codec.
Solid PTZ
Select ON to enable the solid PTZ.
Note
Solid PTZ is not available when Cropping is enabled.
Cropping
You can crop a portion of the image and display the
cropped image on the computer. Cropping reduces the
transmitting data size and thus the network load, and a
higher frame rate is achieved.
Select On to crop the image, or Off.
Notes
• Motion detection (page 91) operates for an image in
the image size that is not cropped even if Cropping is
set to On.
• Cropping is not available when solid PTZ is enabled.
To crop an image
1
Set Cropping to On and click the Area setting
button.
The area setting window appears.
2
Setting the trimming portion
Hold down the left button of the mouse on the still
image and drag the cursor diagonally. The area in a red
frame is the trimming portion.


