Administrating the Camera
Configuring the Network — Network Menu
50
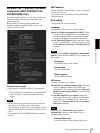
Obtain an IP address automatically (DHCP): Select
this option when a DHCP server is installed on the
network to allow IP address assignment. With this
setting, the IP address is assigned automatically.
Use the following IP address: Select this option when
you set a fixed IP address. With this setting, specify
the IP address, Subnet mask and Default gateway
manually.
Note
When you select Obtain an IP address automatically
(DHCP), make sure that a DHCP server is operating on
the network.
IP address
Type the IP address of the camera.
Subnet mask
Type the subnet mask.
Default gateway
Type the default gateway.
DNS server
Configure the DNS server address.
Obtain DNS server address automatically: Select this
option to obtain the IP address of DNS server
automatically. It can be set only when Obtain an IP
address automatically (DHCP) is selected in the
Network tab.
Use the following DNS server address: Select this
when you set a fixed address as the IP address of the
DNS server. With this setting, specify the addresses
on Primary DNS server and Secondary DNS
server manually.
Note
When you select Obtain DNS server address
automatically, make sure that a DHCP server is
operating on the network.
Primary DNS server
Type the IP address of the primary DNS server.
Secondary DNS server
Type the IP address of the secondary DNS server, if
necessary.
MTU
Enter the MTU value for the Ethernet port. (1000 - 1500)
If IPv6 is enabled, the value must be 1280 or greater.
Host name
Type the host name of the camera to be transmitted to the
DHCP server. This setting is valid only when Obtain an
IP address automatically (DHCP) is selected in the
Network tab.
Domain suffix
Type the domain suffix of the camera to be transmitted
to the DHCP server. This setting is valid only when
Obtain an IP address automatically (DHCP) is
selected in the Network tab.
Note
The domain suffix is sent to the DHCP server as FQDN
(Fully Qualified Domain Name) information when Host
name is set.
HTTP port number
Normally select 80. If you want to use a port number
other than 80, select the text box and type a port number
between 1024 and 65535.
Note
When you have set the HTTP port number to a number
other than 80 in the Network menu or in SNC toolbox,
access the camera again by typing the IP address of the
camera on your Web browser as follows:
Example: Setting port number 8000 when IP address is
192.168.0.100
IPv6 setting
Configure the IPv6 network settings.
IPv6 can be used simultaneously with IPv4.
Only IPv6-specific details are explained here. For
common details, see “IPv4 setting” on page 49.
On/Off
To use IPv6, select On.
Prefix
Enter the Prefix value. (0 to 128)
IPv6 MTU
Enter the MTU value for IPv6. (1280 -1500)
The value must not exceed the MTU value for the
Ethernet port.
OK/Cancel
See “Buttons common to every menu” on page 32.


