


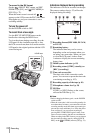

Recording
Recording
23
However, the transition from the last recorded scene
may not be smooth.
• The following functions may not work correctly
with a tape recorded in the HDV, DVCAM, and DV
formats mixed:
– Date search
– Index search
z Tip
• You can record the color bars on a tape. If you record
movies including the color bars, you can adjust the
color while observing the color bars when you are
viewing the pictures on a TV or monitor. To display
the color bars, press BARS. Press BARS again to
hide the color bars. There are 2 types of color bar.
You can select either one in [BARS TYPE] on the
(CAMERA SET) menu (p. 63).
• To ensure smooth transition on a tape from the last
recorded scene to the next, note the following.
– Do not remove the cassette. (The picture will start
recording again without an obvious break even if
you turn the power off).
– Do not record pictures in the HDV, DVCAM, and
DV formats on the same tape.
– Do not record pictures in the system of 50i and 60i
on the same tape.
• You can superimpose the time and date on the
picture by setting [DATE REC] on the
(OTHERS) menu (p. 82). The time and date are
always displayed on the screen during recording.
• The recording time, date, and the camera settings
data are recorded automatically on the tape without
being displayed on the screen. You can view this
information during playback by pressing DATA
CODE (p. 52).
• To display the time data, press TC/U-BIT (p. 104).
• To attach an external microphone (optional), see
page (p. 39).
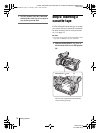
Usable cassettes
When recording in HDV/DV format, it is
recommended that you use mini DV
cassettes.
When recording in DVCAM format, it is
recommended that you use mini DVCAM
cassettes.
b Note
• The transition from the last recorded scene to the
next may not be smooth with the [DV SP] setting.
• You cannot record in the LP mode of the DV format.
• If you use a mini DV cassette when [ REC
MODE] is set to [DVCAM], the possible recording
time will be 1/3 shorter than that indicated on the
tape.
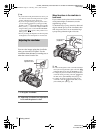
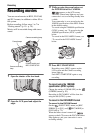
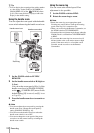
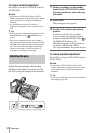
Using zoom
Zoom levers are mounted on the camera itself
and on the handle.
Occasional use of the zoom is effective, but
use it sparingly for the best results.
1 Set the ZOOM switch to LEVER/
REMOTE.
2 Press the power zoom lever slightly for
a slower zoom. Press it further for a
faster zoom.
To record a wider range of view
Press the W side of the power zoom lever.
The subject appears farther away (Wide
angle).
To record a closer view
Press the T side of the power zoom lever.
The subject appears closer (Telephoto).
1 cm (approx. 1/2 inch)*
80 cm (approx. 2 5/8 feet)*
* The minimum distance required between your
camcorder and the subject to get a sharp focus with
that side of the lever.
,continued