


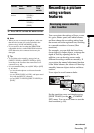

Recording
36
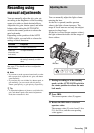
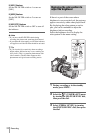
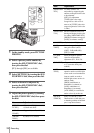
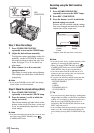
1 In the standby mode, press PICTURE
PROFILE.
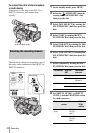
2 Select a picture profile number by
turning the SEL/PUSH EXEC dial,
then press the dial.
[PP1] through [PP6] are available.
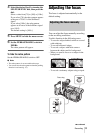
3 Select [SETTING] by turning the SEL/
PUSH EXEC dial, then press the dial.
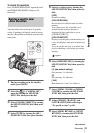
4 Select an item to be adjusted by
turning the SEL/PUSH EXEC dial,
then press the dial.
5 Adjust the picture quality by turning
the SEL/PUSH EXEC dial, then press
the dial.
Item Adjustment
[COLOR
LEVEL]
–7 (low) to +7 (high)
–8: black and white
[COLOR
PHASE]
–7 (greenish) to +7 (reddish)
[SHARP-
NESS]
0 (softer) to 15 (clearer)
[SKINTONE
DTL]
To make wrinkles less
noticeable by suppressing the
outlines on the part in skin color
to be enhanced.
[OFF]: No adjustment
[TYPE1] (the color range
recognized as a skin color is
narrow) to [TYPE3] (the color
range recognized as a skin color
is wide)
[SKINTONE
LVL]
Sets the enhancement level of
the edge of the part in skin color
for setting [SKINTONE DTL].
[HIGH] (to enhance strongly) to
[LOW] (to enhance weakly)
[AE SHIFT] –7 (darker) to +7 (lighter)
[AGC
LIMIT]
Select the upper limit for the
auto gain control (AGC)
([OFF], 12dB, 6dB, 0dB).
[OFF] is 18dB.
[AT IRIS
LMT]
Select the highest aperture
value for the automatic
adjustment (F11, F6.8, F4).
[WB SHIFT] –7 (to make white parts bluish)
to +7 (to make white parts
reddish)
[ATW
SENS]
To set the auto white balance
operation under a reddish light
source such as an incandescent
lamp or candle, or under a
blueish light source such as in
outdoor shade.
[HIGH] (reddishness or
blueishness is reduced) to
[LOW] (reddishness or
blueishness is increased)
[ATW SENS] is not effective
under a clear sky or the sun.
[BLACK
STRTCH]
[ON]: To raise the γ curve
characteristics of the dark part
so that the gradation of the dark
part is reproduced better.
Item Adjustment