


76
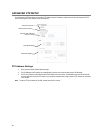
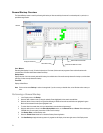
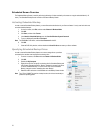
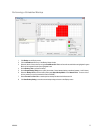
Scheduled Screen Overview
The Scheduled Backup Screen is used for performing bulk backup of video recorded by all cameras on a regular scheduled basis (1-24
hours). The Scheduled Backup Screen is similar to the General Backup Screen.
Activating Scheduled Backup
In order to use the Scheduled Backup feature, you must first activate the function for your Server software. You only need to do this once
to enable scheduled backups.
1. On the Live screen, click Exit, and then select Restart in Windows Mode.
2. Click OK.
3. Click Start, and then click vFormat.
4. In the Need for Scheduled Backup area, click Confirm Windows System Password.
5. Type your Windows System ID and Password.
Note The default ID is DVR Admin, and the default Password is dvr4321.
6. Click OK.
7. Close the DVR Utility window, and then double-click Surveillix Server to restart your Server software.
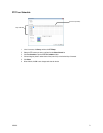
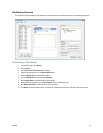
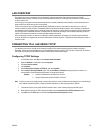
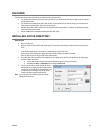
Specifying Scheduled Backup Drives
In order to use the Scheduled Backup feature one or more storage drives or partitions
connected to the recorder must be specified as a backup drive.
1. From the Live screen, click Exit and choose Restart in Windows Mode.
2. Click OK.
3. Double-click My Computer.
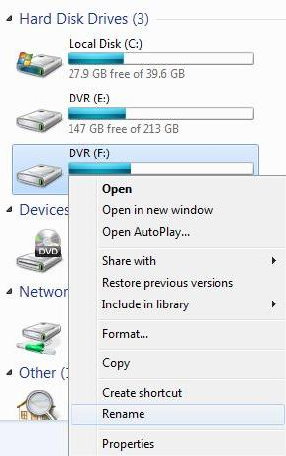
4. Right-click on the drive to specify as a backup drive for Scheduled Backup and
click Rename. Rename the drive to ‘Backup’. Repeat this process for all drives
to use for Scheduled Backup. To remove a drive from use for Scheduled
Backup, change its name to something other than ‘Backup’.
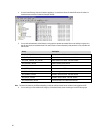
5. Restart Surveillix and return to the Schedule tab in the Backup Center window.
Note The C: Drive CANNOT be used as a backup location; this is done intentionally to
protect the operating system.