


32338AC 95
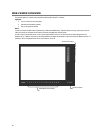
BACKUP VIEWER OVERVIEW
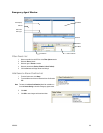
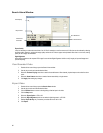
The Backup Viewer allows you to play back the exported video in its proprietary format. Video saved in this format is extremely difficult to
tamper with and therefore is the ideal solution when law enforcement and the legal department are involved. This video cannot be read by
any other viewer. The Backup Viewer operates essentially like the Search portion of the recorder software.
For detailed explanations of these functions, refer to the chapter on Search Options in this manual.
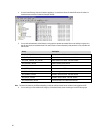
Installing Backup Viewer
Note If you selected “Include Backup Viewer” when exporting your backup, this the Backup Viewer software will load automatically.
1. Insert the Software Installation DVD into the DVD-ROM.
(Do not install on the recorder.)
2. Select the Backup Viewer option to begin installation.
When the Welcome screen opens, click Next.
3. Read the License Agreement and select the appropriate radio button to accept the terms of the license agreement.
Click Next.
4. Select Yes to install the POS component or select No for a basic install.
Click Next.
Note The POS component is only necessary when connecting to a server running the POS Upgrade.
5. When the Choose Destination Location window opens click Next.
This will install Backup Viewer in the default destination folder.
6. Select the shortcuts to install, or clear all boxes for no shortcuts.
Click Next.
7. When the InstallShield Wizard Complete window appears click Finish.
Setup is now complete.
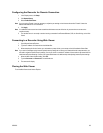
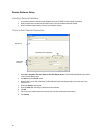
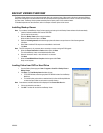
Loading Video from DVD or Hard Drive
1. Open the Backup Viewer program: Start > Programs > Surveillix > Backup Viewer >
Backup Viewer.
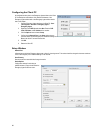
2. Click Open. The Total Backup Search window will open.
For DVD-ROM data, select the appropriate DVD-ROM drive letter from the Backup
Media box.
For hard drive data, select either an attached hard drive from the Backup Media box
or select the Open Folder icon to browse to a specific directory.
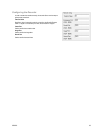
Note Once selected, available video data will be displayed in the Choose Start Hour box.
3. Click on the desired time to select it.
4. Click OK. The video will now load into the Backup Viewer.