


Using The Network Administrator User Interface 39
You can now:
■ associate rules with this VLAN if the rules have already been created,
see “Changing Rule Properties”.
Deleting An Existing VLAN
To delete an existing VLAN entry in 3Com Network Access Manager,
follow these steps:
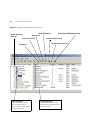
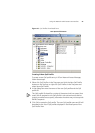
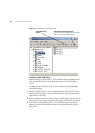
1 Click on VLANs in the Tree pane. The Details pane on the right will list all
of the VLANs in 3Com Network Access Manager.
2 Select the VLAN to delete and right-click. Select Delete.
3 Click Yes to confirm deleting the VLAN from 3Com Network Access
Manager.
If you delete a VLAN which is associated with one or more rules, then the
rules are updated to have a VLAN assignment of 'Unspecified'.
Renaming A VLAN And Changing The VLAN ID
To rename an existing VLAN entry in 3Com Network Access Manager,
follow these steps:
1 Click on VLANs in the Tree pane. The Details pane on the right will list all
of the VLANs in 3Com Network Access Manager.
2 Select the VLAN to rename and right-click. Select Rename.
3 Enter the new name for the VLAN and press Return.
This completes renaming the VLAN entry in 3Com Network Access
Manager.
To change the VLAN ID of an existing VLAN entry in 3Com Network
Access Manager, follow these steps:
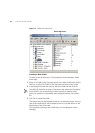
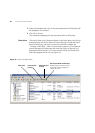
1 Click on VLANs in the Tree pane. The Details pane on the right will list all
of the VLANs in 3Com Network Access Manager.
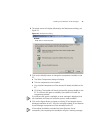
2 Select the VLAN to change and right-click. Select Properties.
The Properties dialog window will appear.
3 Select the VLAN tab and change the ID for the VLAN.
The ID should be a string of characters, for example a number, that
matches the ID assigned to the VLAN during configuration of the
network access device (switch or wireless access point)